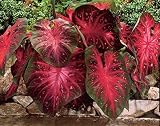
Care Guide: Planting, Soil & Watering
Overview: A tender tuberous foliage plant for tropical and subtropical gardens or as a houseplant (hardiness zone 10b+), grown for its colourful leaves in shade to part shade. It wants rich, moist soil, warmth and humidity, and a steady moderate supply of water.
Quick Care Requirements
| Requirement |
Ideal Condition |
| Planting Season |
Spring through autumn (warm soil) |
| Growth Rate |
Slow to Moderate |
| Soil Type |
Rich, moisture-retentive, well-drained |
| Water Need |
Moderate – keep consistently moist |
Planting & Establishment
- Best Planting Season: Plant tubers in the warm season, spring through autumn, once the soil is warm – they will not stir until it heats up.
- How to Plant:
- Hole Preparation: In ground or pots, plant the tuber a few centimetres deep in warm, moist, humus-rich soil.
- Soil Amendments: Blend plenty of compost or other organic matter into the mix to hold moisture and feed growth.
- Planting Depth: Set the tuber a few centimetres below the surface, knobbly side up; don’t plant into cold soil.
- Growth Speed & Expectations: Slow to moderate; leaves push up once warmth arrives and fill out through the growing season, reaching 10-50 cm.
Soil, Watering & Drainage Care
- Soil Mix & Drainage Needs: A rich, moisture-retentive but free-draining mix is ideal – keep it moist without letting the tuber sit in cold, sodden soil.
- Watering Schedule & Technique:
- Young / Newly Planted: Water sparingly until leaves appear, then keep the soil evenly moist as growth speeds up.
- Established: Water regularly through the growing season to keep the soil consistently moist, never waterlogged.
- Seasonal Adjustments: Water freely in warm weather; as leaves die back the tuber rests and should be kept much drier and warm.
Growing in Pots, Balconies & Indoors
Caladium is a tuberous foliage plant prized for its painted, paper-thin leaves, and the grower rates it a houseplant that also grows well in containers. It loves warmth and shade, making a spectacular indoor pot plant through the warm season before the tuber rests over the cool one.
Quick Details
- Container Size: A medium pot the tuber can fill; group a few for a fuller display
- Indoor Suitability: A genuine houseplant for a warm, humid, brightly-lit room
- Best Spot: Half to full shade – bright, indirect light; only some types take full sun
- Soil & Drainage: Light, airy, free-draining mix that stays lightly moist
- Watering in Pots: Average – evenly moist in warm growth, then kept dry during dormancy
Indoors & On the Windowsill
- Houseplant: A true houseplant for the warm season. Give it warmth, humidity and bright, indirect light; cold or draughts quickly spoil the leaves.
- Dormant rest: The tuber naturally dies back for a dormant rest in the cool season – keep the pot warm and nearly dry, then restart watering when new growth appears.
- Safety: Listed as toxic to dogs and cats – keep it out of reach of pets and children, and never eat any part.
On a Balcony or Patio
- Light, wind & heat: Best on a sheltered, shaded or part-shaded balcony out of harsh midday sun; walls and railings reflect heat and dry pots fast, so check moisture often and shield from strong wind.
- Practicalities: Warm weather only and in shade; the thin leaves tear in wind and scorch in sun, so shelter it and bring it in before cold.
Choosing the Pot, Soil & Long-Term Care
- Pot & drainage: Use a pot with strong drainage holes and skip a standing saucer of water, which invites root rot; terracotta breathes and dries fast, while glazed or plastic holds moisture longer.
- Potting mix: A light, airy, free-draining mix – coir or peat with perlite – that holds a little moisture without going soggy.
- Feeding: Potted plants use up their food faster because frequent watering leaches nutrients away – feed a little more often through the growing season than plants in open ground.
- Repotting: Start the tuber into fresh mix at the beginning of each warm season; keep it dry and frost-free while dormant.
Bloom & Flower Guide
Quick Details
- Bloom Season: Spring into summer
- Flower Appearance: A white-yellowish “ice-pop” flower spike (spadix) wrapped by a leafy bract (spathe)
- Edibility: None – not for eating. All parts contain calcium-oxalate crystals that irritate the mouth and skin
Detailed Blooming Overview
Caladium is grown for its spectacular colourful leaves, but it does flower in spring and summer. The bloom is the arum-family type: a small white-yellowish flower spike (the “ice-pop” spadix) cradled by a wrapping bract. It is quiet compared with the foliage, and many growers remove it so the plant can put its energy into the leaves.
Flower Characteristics
- A white-yellowish spadix (“ice-pop” structure) carrying the tiny true flowers.
- A leafy bract (spathe) wraps around the spike.
Bloom Care & Thinning
- Managing the bloom: Since the leaves are the main show, pinching out the flowers directs more energy into vivid foliage.
- Handling: Wear gloves and keep it away from children and pets – the sap is irritating.
Pruning, Training & Seasonal Maintenance
Caladium is grown purely for its large, colorful leaves that grow from an underground tuber, so “pruning” here means leaf grooming and end-of-season dieback management, not shaping a framework. It tolerates light, ongoing trimming at any time, and the only real timing rule is to let foliage yellow and die back naturally before dormancy rather than cutting green leaves early, since the tuber draws its next season’s energy reserves from those leaves.
Quick Pruning & Maintenance Specs
| Pruning Tolerance |
Low (leaf removal only, no structural cutting) |
| Primary Pruning Window |
Any time for spent/damaged leaves; concentrated in autumn as it enters dormancy |
| Typical Frequency |
Ongoing removal of individual spent leaves |
| Main Objective |
Tidy appearance; support tuber energy storage before dormancy |
| Young Plant Priority |
Leave all leaves in place to build tuber size |
| Mature Plant Priority |
Remove individual yellowing/damaged leaves; let natural autumn dieback finish before cutting back fully |
| Best Tool Type |
Precision snips or hand-pinching at the leaf base |
| Avoid Heavy Pruning During |
While leaves are still green and actively photosynthesizing |
Pruning by Plant Age & Size
Newly Established
Leave all foliage in place while the tuber is establishing; do not remove leaves except for genuinely damaged ones.
Young / Formative
No structural training applies to this geophyte — growth is simply more leaves emerging from the tuber; focus only on removing any damaged or diseased individual leaves.
Mature / Established
Continue removing individual leaves only once they yellow or die back on their own; a mature tuber can support ongoing light leaf grooming without harm.
Seasonal Pruning Schedule
| Ongoing Sanitary |
Objective: tidy appearance. Remove individual dead or damaged leaves as they occur (per this plant’s own care notes) — safe in any season. |
| Dormant/Winter |
Objective: prepare the tuber for dormancy. Once foliage yellows and collapses naturally at season’s end, cut back the remaining dead leaf stalks; do not cut green, still-functioning leaves early, since they are feeding the tuber for next year’s growth. |
Special Growth to Remove
- Individual yellowing, damaged or spotted leaves, cut at the base of the leaf stalk
- The small, inconspicuous “ice pop”-style flower spathe, which is usually pinched out when it appears so the plant’s energy goes into leaf and tuber growth rather than bloom
- Fully collapsed foliage once the plant enters natural dormancy
Container & Small-Space Pruning
Almost always grown in pots or as a houseplant; grooming is identical to in-ground culture — remove spent leaves individually, and once foliage dies back for dormancy, the pot can be kept on the dry side and stored until the tuber resprouts.
Tools
- Precision snips or clean fingertip pinching at the leaf base for all routine leaf removal
Tool Hygiene & Disease Risk
Routine: clean, sharp tools are sufficient for leaf removal. Handle cut material with care and wash hands/tools after pruning, since the plant is documented as toxic to dogs and cats.
Cut Placement & Technique
Cut or pinch individual leaf stalks off cleanly at their base near the tuber crown rather than tearing them, which can damage the crown; remove the flower spathe at its base the same way if choosing to redirect energy to foliage.
Heavy Pruning & Rejuvenation
Not applicable in the shrub-renewal sense — this plant’s “reset” is its natural annual dormancy, not a hard structural cutback; simply let it die back fully at season’s end and clear away the spent foliage.
Post-Pruning Care
After removing an individual damaged leaf, no special aftercare is needed beyond normal watering; once the plant fully dies back for dormancy, reduce watering and store the tuber cool and dry until it resprouts.
Common Pruning Mistakes
- Cutting back green, still-healthy leaves early instead of waiting for natural yellowing, which weakens the tuber’s stored reserves for next season
- Handling cut foliage without care given its toxicity to pets
When NOT to Prune
Do not remove green, actively growing leaves simply for tidiness — wait until a leaf yellows or dies back on its own, especially heading into the dormant season when the tuber most needs that stored energy.
Recommended Tools (by task)
- precision_snips — the only tool needed, for removing individual spent leaves and the optional flower spathe at the base
Pests, Diseases & Troubleshooting
Overview: Caladiums are grown for their spectacular papery leaves, and their vulnerabilities reflect that: sap-sucking and chewing pests that disfigure the thin foliage, tuber and root rots in cold or overwet soil, and leaf-spot organisms in warm humid conditions. Warmth, gentle even moisture, good drainage and clean tubers keep them trouble-free.
Quick Troubleshooting Overview
| Issue / Pest |
Main Symptom |
Primary Solution |
| Aphids |
Sticky, curled new leaves, honeydew |
Water jet, insecticidal soap |
| Spider mites |
Fine stippling and webbing in dry air |
Raise humidity, hose off, oil/soap |
| Thrips |
Silvery streaks, distorted new leaves |
Sticky traps, insecticidal soap/spinosad |
| Caterpillars / slugs |
Holes and ragged chewing on leaves |
Hand-pick, Bt, iron-phosphate bait |
| Tuber rot |
Soft, foul tubers; failure to sprout |
Warm dry storage, fungicide dust, drainage |
| Leaf spot |
Brown/water-soaked spots in humidity |
Airflow, avoid wet leaves, copper |
Common Pests & Management
- Aphids (Aphis / Myzus spp.):
- Symptoms: Green, black or peach-coloured clusters on new leaves and stalks, causing curling, honeydew and sooty mould; they can also spread viruses.
- Prevention & Control: Rinse off with water, wipe leaves, and encourage ladybirds and lacewings; use insecticidal soap for persistent colonies. Control them promptly to limit virus spread.
- Spider mites (Tetranychus spp.):
- Symptoms: Fine pale stippling, bronzing and thin webbing on leaf undersides, worst in warm, dry indoor air — the thin caladium leaf shows damage quickly.
- Prevention & Control: Raise humidity, wipe or hose both leaf surfaces, and treat with insecticidal soap or a light horticultural oil on undersides, repeating to break the cycle.
- Thrips (Frankliniella / Thrips spp.):
- Symptoms: Silvery streaking and speckling on leaves, deformed or scarred new growth, and dark frass specks; thrips also transmit viruses.
- Prevention & Control: Monitor with blue or yellow sticky traps, remove badly affected leaves, and treat with insecticidal soap or spinosad; control aphids and thrips together to reduce virus risk.
- Mealybugs & fungus gnats:
- Symptoms: Mealybugs form white cottony tufts in leaf axils and on stalks with honeydew; fungus-gnat larvae feed on roots and tender tuber tissue in constantly wet mix, with small black flies around the pot.
- Prevention & Control: Treat mealybugs with alcohol swabs, soap or oil. For gnats, let the surface dry between waterings, use sticky traps, and drench with Bacillus thuringiensis subsp. israelensis (Bti) if larvae persist.
- Caterpillars, slugs & snails (outdoors):
- Symptoms: Irregular chewed holes and ragged margins in the leaves, with frass from caterpillars or slime trails from molluscs on shady, damp plantings.
- Prevention & Control: Hand-pick at dusk, use Bt for caterpillars, and ring plants with iron-phosphate bait or grit for slugs and snails.
Diseases & Fungal Issues
- Tuber & root rot (Fusarium, Pythium, Rhizoctonia, Sclerotium):
- Symptoms: Soft, brown or black, foul-smelling tubers, failure to sprout, and collapse of young plants — usually from cold, wet, or poorly drained soil, or damp storage.
- Treatment & Management: Start tubers in warm (above ~20°C), moist-not-wet, free-draining mix and never overwater cool plants. Store dormant tubers dry and warm, discard any soft ones, and dust cut or planting tubers with a fungicide (sulphur or a labelled product). Southern blight (Sclerotium) shows white fungal threads and mustard-seed sclerotia at the soil line — remove affected plants and surrounding soil.
- Fungal & bacterial leaf spot (Colletotrichum, Cephalosporium, Xanthomonas):
- Symptoms: Brown, tan or water-soaked spots, sometimes with yellow halos, that enlarge in warm, humid, wet-foliage conditions; bacterial spots look greasy and translucent.
- Treatment & Management: Water at the base to keep leaves dry, improve airflow and spacing, and remove affected leaves. Copper-based sprays help with both fungal and bacterial spots in humid weather; avoid overhead watering.
- Root-knot nematode (Meloidogyne spp.):
- Symptoms: Stunted, off-colour plants with galled, knotted roots and poor vigour in infested soil.
- Treatment & Management: Plant clean tubers in fresh or pasteurised mix, practise rotation in beds, and discard heavily galled plants; avoid moving infested soil.
- Dasheen mosaic virus (occasional):
- Symptoms: Mosaic mottling, feathering and leaf distortion that does not wash off, spread by aphids and infected tubers.
- Treatment & Management: There is no cure — remove and destroy affected plants, control aphid vectors, and propagate only from clean, healthy tubers.
Growing Difficulties & Abiotic Problems
- Leaf scorch / fading in excess sun:
- Cause & Symptoms: Bleached, browned or crisped patches and loss of vivid colour when shade-loving types get too much direct sun or dry wind.
- Correction Strategy: Give bright, filtered light or morning sun only (some cultivars take more), keep humidity up, and avoid hot, dry, exposed positions.
- Cold damage & dormancy:
- Cause & Symptoms: Yellowing, wilting and collapse below about 15–18°C; caladiums are tropical and go dormant, dropping leaves, when cool.
- Correction Strategy: Keep above ~18°C in active growth; as leaves fade in autumn, lift and store tubers warm and dry, or leave in place only in frost-free climates. Do not overwater a dormant or cooling plant.
- Tip & margin burn from salts / dry air:
- Cause & Symptoms: Brown, crispy leaf edges and tips from fertiliser-salt build-up, low humidity, or fluoridated/chlorinated water.
- Correction Strategy: Flush pots periodically, feed weakly, raise humidity, and use rain or filtered water; keep moisture even, as swings between wet and dry also brown the margins.
What Helps — Products & Tools
Helpful items are insecticidal soap and horticultural/neem oil for aphids, mites, thrips and mealybugs, blue/yellow sticky traps for thrips and gnats, Bti drench for fungus gnats, Bt and iron-phosphate bait for caterpillars and slugs, a fungicidal tuber dust plus warm, free-draining mix to prevent rot, and copper fungicide for leaf spots in humid weather.
Propagation Guide
Caladium is propagated almost entirely by dividing the daughter tubers that form around the mother tuber, since this is the only reliable way to reproduce a specific leaf color and pattern; seed is rarely used in cultivation and will not reproduce the exact coloring. Propagation is Easy.
Quick Propagation Specs
| Best Propagation Method |
Tuber division (daughter tubers) |
| Alternative Methods |
Seed (species only, not for named leaf-color forms) |
| Propagation Difficulty |
Easy |
| Seed True-to-Type |
No – site notes daughter plants are needed to keep the same leaf colors |
| Vegetative True-to-Type |
Yes |
| Best Propagation Season |
Spring, as new growth begins |
Growing from Seed
Caladium rarely flowers and sets seed in cultivation, and is grown almost exclusively from tubers. Where seed is available, seedlings will not reproduce the parent’s exact leaf coloration, matching the site’s own note that daughter plants are needed to keep the same colors.
Rhizomes, Tubers, Bulbs & Corms
Tuber/Daughter-Tuber Division
The tuber naturally forms smaller daughter tubers around the mother tuber; these can usually be gently separated by hand when lifting or repotting, each with its own growing point (an "eye"), without needing to cut. When more divisions are wanted, the larger mother tuber can instead be cut into sections, making sure each piece keeps at least one healthy eye.
Timing
Divide in spring, as new eyes begin to swell or sprout, ahead of or at the start of the growing season.
Curing & Handling
Let any cut surfaces dry/callus briefly before replanting to reduce rot risk. Wear gloves when cutting or handling tubers, since the plant is toxic (an irritant) to pets and to skin/eyes.
Dormant Storage
Outside the growing season, whole tubers should be stored dry, not kept in the moist conditions this plant needs while actively growing, to avoid rot.
Planting Orientation
Replant divisions with the eye/growing point facing upward.