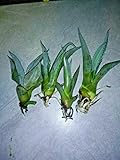
Care Guide: Planting, Soil & Watering
Overview: The Agave ellemeetiana is a drought-tolerant, sun-loving agave that thrives in warm, frost-free conditions and fast-draining ground. It wants a lean, sandy or gritty soil, full sun to light shade, and only occasional watering, staying its healthiest when the soil dries out fully between drinks.
Quick Care Requirements
| Requirement |
Ideal Condition |
| Planting Season |
Spring in cooler zones; spring through summer or autumn in warmer zones; year-round in zone 11+ |
| Growth Rate |
Slow |
| Soil Type |
Sandy, gritty, sharply well-draining; low in organic matter |
| Water Need |
Low – let the soil dry out fully between waterings |
Planting & Establishment
- Best Planting Season: Plant in spring once the risk of frost has passed and the soil has warmed. Following the source hardiness-zone guidance: Spring in cold hardiness zone 9, spring to summer in hardiness zone 10a, spring to autumn in hardiness zone 10b, all year in hardiness zone 11+.
- How to Plant:
- Hole Preparation: Dig a hole roughly the same depth as the root ball and a little wider, in a spot with excellent drainage; in rainy ground raise the planting area or use a raised bed so the plant never sits in a puddle.
- Soil Amendments: Work coarse sand, grit or fine gravel into the backfill to sharpen drainage; agaves need little organic matter, so keep compost minimal.
- Planting Depth: Set the plant so the root collar sits right at soil level – never bury the base of the rosette or the stem, which invites rot.
- Growth Speed & Expectations: Expect slow, steady growth; plants grown cooler than their native range add leaves more slowly and take extra years to reach blooming size.
Soil, Watering & Drainage Care
- Soil Mix & Drainage Needs: Use an open, airy, sandy soil that drains freely; in containers pick a gritty cactus/succulent mix with plenty of drainage holes to keep the roots from staying wet, since standing moisture is the main cause of root rot.
- Watering Schedule & Technique:
- Young / Newly Planted: Water lightly and often enough to keep the soil barely moist while roots establish, giving a small amount every few days and never letting it stand soggy.
- Established: Switch to deep but infrequent watering – soak thoroughly, then let the soil dry out completely before watering again.
- Seasonal Adjustments: Cut back sharply in cool, wet winters (little to no water when dormant) and water a bit more often during prolonged summer heat; mulch young plants over a cold winter for extra protection.
Growing in Pots, Balconies & Indoors
Agave ellemeetiana (Agave ellemeetiana) is a compact, sculptural succulent that takes very well to pot culture – which is how the grower recommends growing it, as a sun-loving patio, balcony or bright-windowsill plant rather than a true indoor houseplant. It needs strong, direct light, so deep inside a room it struggles; give it the very brightest spot you have.
Quick Details
- Container Size: A pot about 30-50% larger than the root ball; pot up into a bigger container as it fills
- Indoor Suitability: Not a low-light houseplant (the grower says no); a compact or young plant can sit on a very bright, sunny windowsill
- Best Spot: Full sun to light shade – the brightest, sunniest position you have
- Soil & Drainage: Fast-draining gritty cactus/succulent mix with plenty of drainage holes
- Watering in Pots: Sparingly – let the mix dry out fully between waterings and never leave it soggy
Indoors & On the Windowsill
- Houseplant limits: The grower does not treat this agave as an indoor houseplant – like most agaves it demands full sun, and an ordinary room is too dim to keep the rosette tight and healthy.
- Windowsill growing: A young or naturally compact plant grows well on the hottest, brightest windowsill you can offer (a south- or west-facing aspect is ideal), turned now and then so the rosette stays even.
- Overwintering indoors: In cold-winter climates a potted agave is easy to protect – bring it into a bright, cool, frost-free room or porch for the winter and keep it nearly dry until warmth returns.
- Keep it safe: Agave sap can irritate skin and eyes and the leaf tips are sharp and spine-tipped, so stand it out of reach of children and pets.
On a Balcony or Patio
- Light & warmth: This is where an agave shines – give it the sunniest, most sheltered corner. Walls and paving throw back heat, which it loves, but that also dries pots quickly, so check the mix in hot spells.
- Wind & weight: A heavy, wide-based pot keeps a spiny rosette stable on an exposed balcony; as the plant matures and eventually sends up its tall flower stalk it becomes top-heavy, so weight the base (see the grower’s tip below). Make sure drainage water can escape and run away from the balcony floor.
Choosing the Pot, Soil & Long-Term Care
- Pot & drainage: Choose a pot about 30-50% bigger than the root ball with plenty of drainage holes, and skip a standing saucer of water – wet feet quickly rot agave roots. Terracotta is ideal because it breathes and dries faster than glazed or plastic.
- Potting mix: A gritty, free-draining cactus/succulent mix – for example potting soil cut with coarse sand, perlite or pumice for sharp drainage.
- Feeding: Agaves are light feeders; a little diluted low-nitrogen or cactus feed once or twice through the growing season is plenty, as potted plants lose nutrients each time water drains through.
- Potting up & pups: When the roots fill the pot, move it up to the next size; a mature plant also needs extra room for the offsets (daughter plants) it forms around the base. Every few years the mix breaks down and drains poorly – refresh it with new gritty mix when you pot up.
Grower’s Container Tip
- Weight the base for stability: A mature agave can throw a tall, heavy flowering stalk – the grower advises placing something heavy in the base of the pot so the whole container does not become top-heavy and topple.
Bloom & Flower Guide
Quick Details
- Bloom Season: Spring
- Time to First Bloom: Once in a lifetime, after many years of growth (often a decade or more); the rosette is monocarpic and dies after flowering, leaving offsets to carry on.
- Flower Appearance: Yellow flowers carried high on a tall flower stalk that rises well above the leaves.
- Edibility: Ornamental; the raw plant’s sap is an irritant, so the flowers are not treated as edible.
Detailed Blooming Overview
Century plant (Agave ellemeetiana) is a monocarpic succulent — it spends years, sometimes decades, building its rosette of fleshy leaves before sending up a single dramatic flower stalk. As our grower notes, the plant flowers once and then dies, with young offsets rising to replace it. Blooming typically comes in spring, when the tall stalk lifts the flowers well above the foliage.
Flower Characteristics
- Yellow flowers borne on a tall stalk that rises well above the rosette.
- Flowers open along a branching, candelabra-like inflorescence typical of the genus Agave.
- Rich in nectar — pollinated at night by bats and moths, and by day by nectar-feeding birds such as hummingbirds.
Bloom Care & Thinning
- Enjoy the once-in-a-lifetime show: Because the rosette blooms only once, simply leave the stalk in place to enjoy it — there is no thinning to do.
- After flowering: The parent rosette dies back naturally; cut down the spent stalk and keep the offsets (pups) to continue the planting.
- Pollination & seed set: Pollinated by bats, moths and nectar-feeding birds; a well-pollinated stalk sets seed, and many agaves also form bulbils (small plantlets) along the flower stalk.
Bloom Health & Protection
- Agave snout weevil (Scyphophorus acupunctatus): This weevil tends to target large, mature agaves — often just as they approach their once-in-a-lifetime bloom — and can collapse the crown. A soil-applied systemic insecticide during active growth, together with prompt removal of infested rosettes, helps limit its spread.
- Crown and heart rot: In damp conditions, or following weevil or frost damage, the base can rot. Sharp drainage, careful watering and good airflow are the best protection.
Pruning, Training & Seasonal Maintenance
Agave ellemeetiana is a mid-sized rosette (60–90cm) that needs almost no routine pruning beyond removing individual dead leaves as they occur. Like other agaves it is monocarpic — the rosette blooms once, in spring, then declines — so the one scheduled task is removing the spent flower stalk once it has fully dried after that bloom. Pruning here never shapes future form; the rosette’s structure is fixed from the start.
Quick Pruning & Maintenance Specs
| Pruning Tolerance |
Low (dead-leaf and post-bloom stalk removal only) |
| Primary Pruning Window |
Any time, as leaves die back |
| Secondary Maintenance Window |
After the spring bloom – remove the dried flower stalk |
| Typical Frequency |
A few times a year, opportunistic |
| Main Objective |
Sanitary leaf removal; offset management; stalk removal after bloom |
| Young Plant Priority |
Retain all leaves — this slow-growing species needs the full leaf mass to reach flowering size |
| Mature Plant Priority |
Watch for the spring bloom stalk and plan for offset succession afterward |
| Best Tool Type |
Bypass secateurs for leaves; loppers for the stalk base (moderate rosette size, no exceptional stalk height reported) |
| Avoid Heavy Pruning During |
Cold snaps toward the edge of its zone 9 overwinter range |
Pruning by Plant Age & Size
Newly Established
Remove only transplant-damaged leaves. No cosmetic trimming — growth is slow and every leaf is stored energy.
Young / Formative
No structural training applies; the rosette self-forms. Remove leaves only once fully brown at the base.
Mature / Established
Once the rosette reaches blooming maturity, its main event is the single spring flowering; after that, attention shifts to removing the spent stalk and managing the basal offsets that will replace it.
Seasonal Pruning Schedule
| Ongoing Sanitary |
Objective: tidy appearance and plant health |
Remove: fully dead/brown leaves only |
Do not remove: green leaves |
Response: none, cosmetic/health only |
Flowering impact: none |
| Post-Flowering (spring) |
Objective: manage the dying mother rosette after its one bloom |
Remove: the flower stalk once fully dry; the rosette once fully collapsed |
Do not remove: stalk or rosette while still green — nutrients are being resorbed into the offsets |
Response: reserves transfer to basal pups |
Flowering impact: this rosette will not rebloom |
Special Growth to Remove
- Dead leaves, cut at the base once fully brown.
- The spent flower stalk, left until fully dry before cutting at ground level.
- The mother rosette itself once fully dead.
- Basal offsets — the plant’s succession; thin only if the clump becomes crowded.
Container & Small-Space Pruning
At 60–90cm this species suits containers reasonably well. Choose a pot only 30–50% larger than the root ball, and plan to divide or repot as offsets fill the space and soil drainage declines over a few years — that division work, not pruning, is the main container-management task.
Tools
Bypass secateurs for individual dead leaves; loppers for the flower stalk base once dry. No pole tool is needed at this rosette size.
Tool Hygiene & Disease Risk
Increased risk: agave snout weevils are drawn to stressed or blooming agaves and can enter through crown wounds. Use clean blades, avoid unnecessary nicks near the base, and remove dying tissue promptly rather than leaving it half-attached.
Cut Placement & Technique
Cut dead leaves close to the base without slicing into the central crown. Angle the stalk cut so water sheds away from the crown rather than pooling.
Heavy Pruning & Rejuvenation
Not tolerated. The single growing point means any cut into the crown kills that rosette. Renewal comes only from basal offsets after the mother rosette completes its one bloom cycle.
Post-Pruning Care
No feeding after cuts. After stalk removal, keep watering minimal and check the crown area occasionally for weevil entry rather than watering more.
Common Pruning Mistakes
- Removing green leaves for a tidier look, wasting reserves this slow grower needs.
- Cutting the flower stalk while still green, before nutrient resorption finishes.
- Nicking the crown while trimming a low leaf in the tight rosette.
When NOT to Prune
- Don’t cut the stalk while flowers are open and being visited by pollinators (moths, bats, hummingbirds, sunbirds).
- Avoid heavy leaf removal just before a cold snap near the edge of its zone 9 range.
- Don’t prune right after transplanting while roots re-establish.
Recommended Tools (by task)
- bypass_secateurs – clean removal of individual dead leaves at the base.
- loppers – cutting the dried flower stalk at ground level.
- blade_disinfectant – reduces the chance of introducing rot or attracting snout weevils through fresh wounds.
Pests, Diseases & Troubleshooting
Overview: The Soft-leaf Agave (Agave ellemeetiana) is a tough succulent whose troubles are mostly self-inflicted through excess moisture rather than pests. Being a smaller, fine-leaved agave, this species is a less favoured snout-weevil host, but the weevil can still strike large or stressed plants and is worth watching for. An unusual spineless, soft-leaved agave that appreciates light shade; its tender leaves scorch easily in full desert sun and are more attractive to scale and mealybugs than to the snout weevil. Management is overwhelmingly cultural — sharp drainage, careful watering, good airflow and regular inspection prevent almost every problem before any spray is needed.
Quick Troubleshooting Overview
| Issue / Pest |
Main Symptom |
Primary Solution |
| Agave Snout Weevil |
Rosette suddenly loosens, wilts and collapses; rotten, smelly base |
Remove & destroy infested plants; preventative systemic on high-value plants |
| Scale & Mealybugs |
Waxy bumps or white cottony tufts in leaf axils; yellowing |
Wipe off / horticultural oil or insecticidal soap; check roots for mealybugs |
| Agave & Spider Mites |
Corky scarred ridges or fine stippling/bronzing on leaves |
Isolate; wash foliage, raise humidity; miticide or sulphur if severe |
| Crown / Root Rot |
Soft, dark, water-soaked base; leaves grey and pull away |
Cut to clean tissue, dry out; improve drainage and reduce watering |
| Bacterial Soft Rot |
Fast, slimy, foul-smelling collapse of the crown |
Cut out all rot with sterile blade; keep dry; destroy if severe |
| Sunburn / Overwatering |
Bleached scorch patches, or soft translucent yellowing |
Acclimatise to sun gradually; water only when soil is fully dry |
Common Pests & Management
- Agave Snout Weevil (Scyphophorus acupunctatus):
- Symptoms: The adult is a dull black snout beetle about 1 cm long. The first visible sign is often a rosette that suddenly loosens, wilts and collapses, with the lower leaves shrivelling and the whole crown able to be lifted or toppled by hand. The real damage is done by the grub-like larvae tunnelling through the core and base, and the weevil introduces bacteria that turn the heart into a foul-smelling mush. Look for chewing wounds and oozing near the base.
- Prevention & Control: Keep plants unstressed and inspect regularly, particularly in warm weather and on large plants building toward bloom. Remove and destroy infested plants promptly (do not compost them) to break the breeding cycle, and clean tools between plants. Avoid wounding the base. Where the weevil is known locally, a preventative soil-applied systemic insecticide on high-value plants is the main chemical option, timed for adult activity; encourage general predator diversity in the garden.
- Armored & Soft Scale (e.g. Diaspididae and Coccidae):
- Symptoms: Small, immobile brown, grey or waxy bumps clustered along leaf bases, in the rosette and on the undersides of leaves. Heavy infestations cause yellow blotches, sticky honeydew (soft scale) and sooty mould. They are easily mistaken for natural leaf markings, so scrape one to confirm it lifts off.
- Prevention & Control: Inspect new plants before introducing them and wipe off light colonies with an alcohol-dipped cloth or soft brush. Encourage ladybirds and parasitic wasps. For persistent scale, thorough coverage with horticultural oil or insecticidal soap smothers crawlers and adults; repeat to catch successive generations, and spray in the cool of the evening.
- Mealybugs, incl. Root Mealybugs (Pseudococcus/Rhizoecus spp.):
- Symptoms: White, cottony tufts tucked deep in the leaf axils and crown, causing stunting and yellowing; ants farming them are a giveaway. Root mealybugs are subtler — a plant that sulks despite good care, with white waxy ‘mould’ and insects on the roots and inside the root-ball when unpotted.
- Prevention & Control: Quarantine new plants and check the roots at repotting. Dab foliar colonies with an alcohol-soaked cotton bud and rinse the crown. For root mealybugs, bare-root the plant, wash away all old soil, trim badly infested roots and repot into fresh, gritty mix in a clean pot; a soil drench of insecticidal soap or systemic helps in stubborn cases. Control ants to slow re-infestation.
- Eriophyid Agave Mite (Aceria/Eriophyes sp.):
- Symptoms: These microscopic mites feed unseen in the tightly folded centre of the rosette; the damage only appears as leaves expand, showing up as corky, scabby ridges, distorted leaf edges and rough scarred tissue that is permanent for the life of the leaf. It is often mistaken for physical or frost damage.
- Prevention & Control: Isolate affected plants, as the mite spreads plant to plant by contact and on hands and tools. There is no cure for already-scarred leaves — manage it going forward by cleaning tools, and treating the crown with a miticide or sulphur where infestation is confirmed and severe. Badly disfigured plants are best discarded to protect a collection.
- Spider Mites (Tetranychus spp.):
- Symptoms: Fine pale stippling or a bronzed, dusty look to the leaves, worst in hot, dry, dusty conditions and on sheltered plants. In bad cases fine webbing appears in the crevices; tap a leaf over white paper to see the tiny moving specks.
- Prevention & Control: Mites hate humidity and clean foliage, so hosing the plant down and keeping it free of dust goes a long way. Preserve predatory mites and other beneficials by avoiding broad-spectrum sprays. For outbreaks use insecticidal soap or horticultural oil with good coverage, or a specific miticide, repeating as needed.
- Thrips (Thysanoptera):
- Symptoms: Slender insects that rasp the leaf surface, leaving silvery, scratched-looking streaks flecked with tiny black droppings, mainly in the young central leaves. Cosmetic on tough agaves but disfiguring on prized specimens.
- Prevention & Control: Blue or yellow sticky traps help monitor and reduce numbers, and good hygiene removes their breeding sites. Encourage lacewings and predatory mites. If needed, spot-treat the crown with insecticidal soap or horticultural oil.
Diseases & Fungal Issues
On agaves, nearly every serious disease is really a moisture problem — keep them dry, airy and unwounded and disease is rare.
- Crown & Root Rot (Phytophthora and Pythium spp.):
- Symptoms: Soft, dark, water-soaked rot starting at the base or centre, with lower leaves yellowing, greying and pulling away easily; roots turn brown and mushy. Almost always follows wet, poorly drained soil or water sitting in the crown.
- Treatment & Management: Prevention is everything — fast-draining gritty mix, careful watering, and never letting water stand in the rosette. Cut out rotted tissue back to clean flesh, let it callus dry, and repot into fresh dry mix; a copper or phosphonate fungicide can support recovery, but badly rotted plants rarely recover.
- Bacterial Soft Rot (Pectobacterium/Erwinia spp.):
- Symptoms: A fast, slimy, foul-smelling collapse of the crown or leaf bases, often following weevil damage, frost injury or a wound. Tissue turns to wet, dark mush.
- Treatment & Management: Act fast: cut away all affected tissue well into healthy flesh with a clean blade, sterilising between cuts, and let the wound dry hard. Keep the plant dry and airy. There is no reliable chemical cure, so removing infected plants protects the rest of the collection.
- Anthracnose (Colletotrichum agaves):
- Symptoms: Sunken dark lesions with reddish or orange-pink spore masses in the centre, mostly in warm, humid, wet conditions and on crowded plants; lesions can run together and rot large areas.
- Treatment & Management: Improve airflow and spacing, avoid overhead watering, and remove affected leaves. In persistent cases a copper-based fungicide, applied preventatively in humid spells, keeps it in check.
- Fungal Leaf Spots (e.g. Cercospora, Coniothyrium):
- Symptoms: Round to oval grey, brown or black spots, sometimes ringed, scattered on the leaves; mostly cosmetic but a sign of conditions that are too damp or crowded.
- Treatment & Management: Cut off badly spotted leaves, water at the base only, and open up spacing for air movement. Copper or sulphur fungicide is rarely needed but can protect valued plants under prolonged humidity.
Growing Difficulties & Abiotic Problems
- Overwatering & Root Rot (cultural):
- Cause & Symptoms: The commonest killer of agaves. Soggy soil starves the roots of air and invites rot fungi; leaves go soft, translucent, yellow or greyish and the base turns mushy.
- Correction Strategy: Plant in sharply draining, gritty, mineral soil and water only when the soil is fully dry, much less in cool weather. Use pots with drainage holes, never let plants sit in a saucer of water, and err firmly on the side of too dry.
- Sunburn / Sun Scorch (abiotic):
- Cause & Symptoms: Sudden strong sun on unacclimatised tissue leaves permanent tan, white or brown scorched patches, usually on the most exposed side. Because this is a soft, thinner-leaved agave that naturally takes some shade, it scorches far more readily than tough desert species and should be hardened off gradually and shaded from the fiercest afternoon sun.
- Correction Strategy: Acclimatise plants to full sun gradually over a few weeks, and provide light afternoon shade during the most intense heat. Scarring is permanent but not fatal; new growth comes in clean.
- Frost & Cold Damage (abiotic):
- Cause & Symptoms: Hard frost ruptures leaf cells, leaving mushy, translucent or brown-scarred areas that later dry out; cold combined with wet soil is what most often leads to fatal rot.
- Correction Strategy: Keep plants dry through cold spells, as dry agaves take far more cold than wet ones. Protect from hard frost with cover or by moving pots under shelter, and leave frost-damaged leaves in place until all danger of frost has passed before tidying them.
- Etiolation & Edema (abiotic):
- Cause & Symptoms: Too little light stretches the rosette into a pale, loose, weak-leaved shape (etiolation); too much water taken up faster than it is lost causes corky, blister-like bumps on the leaves (edema).
- Correction Strategy: Give the plant bright light suited to its type, and moderate watering with good airflow to prevent edema. Stretched growth will not re-tighten, but corrected conditions produce a firm, compact rosette going forward.
What Helps — Products & Tools
For this agave the useful kit is simple: horticultural (mineral) oil and insecticidal soap for scale, mealybugs and mites; isopropyl alcohol and a soft brush for spot-cleaning; blue/yellow sticky traps for thrips monitoring; a sulphur or copper fungicide for the rare fungal outbreak; and, where the snout weevil is established locally, a soil-applied systemic insecticide for high-value plants only. Above all, a gritty, fast-draining mineral soil mix and disciplined watering do more than any product. Always follow the label and protect pollinators — spray oils and soaps in the cool of the evening.
Propagation Guide
Agave ellemeetiana can be grown from seed, which is usually true-to-type and germinates in 2–4 weeks, but the fastest and most reliable way to get a mature-looking clone is dividing the basal offsets it produces around the rosette. Division is Easy, while seed and leaf/stem cuttings are Moderate and slower to reach a similar size.
Quick Propagation Specs
| Best Propagation Method |
Division of basal offsets (pups) |
| Alternative Methods |
Seed; leaf/stem-base cuttings |
| Propagation Difficulty |
Easy (offsets); Moderate (seed, cuttings) |
| Seed True-to-Type |
Usually true-to-type |
| Vegetative True-to-Type |
Yes |
| Best Propagation Season |
Spring to summer for sowing (possible autumn/winter in hot climates); late spring to early summer for offsets and cuttings, though cuttings can be started indoors at other times |
| Seed Germination Time |
2–4 weeks |
| Cutting Rooting Time |
Several weeks to about a month |
| Germination Temperature |
Not specified on this page; agave seed generally germinates best around 21–27°C (70–80°F) |
| Seed Sowing Depth |
0.5cm (0.25in) |
Growing from Seed
Seed Handling & Viability
Store saved seed in a dry, dark place at room temperature until sowing.
Sowing Season
Best sown spring to summer; sowing in autumn or winter is also possible in hot climates.
Sowing Depth & Orientation
Sow at about 0.5cm (0.25in) deep, spacing seedlings roughly 20–30cm (8–12in) apart as they develop.
Germination Conditions
Sow in a sunny or bright, well-ventilated location in well-draining soil; keep the soil lightly moist, watering a small to average amount, and don’t let it dry out.
Germination Time
Around 2–4 weeks.
Seedling Care
Keep seedlings in bright light with moist, well-ventilated soil as they establish.
Stem & Leaf Cuttings
Cutting Type
Individual leaves removed near their base, or an offset/rosette section cut with a bit of stem tissue attached.
Best Timing
Late spring to early summer roots fastest, though indoor cuttings can be started at other times.
Cutting Preparation
Cut by hand rather than a blade where possible; a leaf-only cutting needs at least 24 hours to callus, while a cutting that includes stem tissue needs several more days for the wound to heal before planting.
Rooting Setup
Plant the callused cutting in well-drained soil, watering every few days to two weeks and letting it dry between waterings without fully drying out.
Rooting Hormone
Not necessary for this genus; cuttings root readily without it.
Rooting Time
Roots typically begin forming after a few weeks, with establishment taking up to about a month.
Division, Offsets, Pups & Suckers
Basal offsets (“daughter plants”) give the fastest, most dependable true clone. When separating a pup, wash away the surrounding soil to expose the roots rather than pulling it blind, taking as much of its own root mass as possible. After transplanting, water lightly every day at first rather than heavily, tapering off and avoiding overwatering as it establishes.