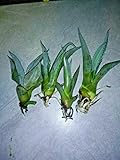
Care Guide: Planting, Soil & Watering
Overview: Agave tubulata is a slow-growing, drought-tolerant succulent that thrives in full sun to light shade and sharply drained, sandy or gritty soil, and does best in a frost-free position. It stores water in its fleshy leaves, so it needs only occasional deep watering and must never be left sitting in wet ground.
Quick Care Requirements
| Requirement |
Ideal Condition |
| Planting Season |
Spring after the last frost in cooler zones; year-round in frost-free zone 11+ |
| Growth Rate |
Slow |
| Soil Type |
Sharply draining, sandy or gritty; poor to moderately fertile |
| Water Need |
Low – drought tolerant; let the soil dry out fully between waterings |
Planting & Establishment
- Best Planting Season: Plant in spring after the last frost in cooler zones; spring in cold hardiness zone 9, spring to summer in hardiness zone 10a, spring to autumn in hardiness zone 10b, all year in hardiness zone 11+. In frost-free climates it can be set out at almost any time, ideally at the start of the warm season.
- How to Plant:
- Hole Preparation: Dig a hole a little wider than the root ball on ground that drains freely; in wet or clay-prone sites plant on a mound or raised bed so the crown never sits in a puddle.
- Soil Amendments: Work in coarse sand, grit or pumice to open up heavy soil; agaves want fast drainage far more than richness, so keep added organic matter light.
- Planting Depth: Set the plant so the base of the leaves (the root collar) sits at or just above soil level – never bury the stem or lower leaves, which invites rot.
- Growth Speed & Expectations: This is a slow grower; in cooler-than-native conditions the rosette expands more slowly and takes extra years to reach flowering size. Give it space and let it fill in over several seasons.
Soil, Watering & Drainage Care
- Soil Mix & Drainage Needs: Use a free-draining, gritty mix – a cactus/succulent blend or garden soil cut with sand and pumice. In containers make sure there are ample drainage holes, and refresh the mix every few years as it breaks down and drains less freely; sharp drainage is the single best defence against root rot.
- Watering Schedule & Technique:
- Young / Newly Planted: Water lightly every few days at first to help roots establish, keeping the mix barely moist but never soggy.
- Established: Water deeply but infrequently, then let the soil dry out completely before watering again; overwatering is far more dangerous to an agave than drought.
- Seasonal Adjustments: Water more often during hot, dry spells and cut back sharply in winter, when the plant is resting and cold, wet soil can be fatal.
Growing in Pots, Balconies & Indoors
Agave tubulata is a large, sun-loving agave – leaves 70-120 cm (28-48 in) with a stalk of 1.5-2 m (5-6 ft). It is not a houseplant, and in time it grows too big for a windowsill or indoor life; the grower keeps it as an outdoor plant. It does very well in a big, free-draining container on a hot, sunny patio or balcony, especially while young, but plan to pot it up generously or move it into the ground in frost-free climates as it matures.
Quick Details
- Container Size: Choose a pot about 30-50% larger than the root ball and pot up as it fills out; a mature clump needs extra room for its offsets (daughter plants)
- Indoor Suitability: Not a houseplant and eventually too large for indoors or a windowsill; grow it as a patio or balcony container plant
- Best Spot: Full sun to half shade – the brightest, hottest position you have
- Soil & Drainage: Fast-draining, gritty succulent mix with plenty of drainage holes
- Watering in Pots: Water sparingly and let the mix dry out between waterings – never let it sit wet
Indoors & On the Windowsill
- Houseplant limits: The grower does not grow it indoors, and it is simply too large and too sun-hungry for a room. Deep indoor light is far too weak for this full-sun succulent, and it will etiolate (stretch and weaken).
- Windowsill growing: Only a young, small plant could sit briefly on the sunniest windowsill; it will soon need a large patio pot with direct sun.
- Overwintering: In climates with frost, this is a key reason to keep it potted – move the container into a bright, cool, frost-free spot for winter and keep it nearly dry until warmth returns.
On a Balcony or Patio
- Light & wind: Give it the sunniest, most sheltered corner. Walls and railings reflect a lot of heat and pots dry quickly, so check the mix in hot spells – though this succulent shrugs off drought far better than most container plants.
- Practicalities: A gritty mix in a sturdy pot is heavy – handy for stability under the tall bloom spike – but make sure drainage water escapes freely and does not pool on the balcony floor. Keep the sharp leaf-tips clear of walkways and seating.
Choosing the Pot, Soil & Long-Term Care
- Pot & drainage: Use a pot roughly 30-50% wider than the root ball with strong drainage holes; skip a standing water saucer to avoid root rot. Terracotta suits it well – it breathes and dries fast, which a succulent likes – while glazed or plastic pots hold moisture longer.
- Potting mix: A free-draining cactus and succulent mix, or a peat/coir-based mix opened up with plenty of perlite, pumice or coarse grit.
- Feeding: Feed only lightly – nutrients leach from pots as water drains through, but agaves are slow, lean feeders, so a weak succulent feed once or twice during the growing season is ample.
- Repotting: The grower notes drainage worsens after a few years, so refresh the mix and pot up every couple of years, giving a mature plant more room for its offsets at the same time.
Grower’s Container Tip
- Sizing, offsets & the flower stalk: Start with a pot about 30-50% larger than the root ball and move up a size once the roots fill it; a fully grown plant needs the extra width for its daughter plants. When it throws up its tall bloom spike the top can become heavy and unbalanced, so add weight (stones or bricks) in the base of the container to stop it toppling. Make plenty of drainage holes, and because drainage declines after a few years, replace the tired old mix with fresh soil.
Safety: Agaves are toxic if eaten and the sap can irritate skin and eyes, while the leaf-tips are sharply spined – site pots away from children and pets and out of busy walkways.
Bloom & Flower Guide
Quick Details
- Bloom Season: Spring to summer, once the rosette reaches flowering maturity
- Time to First Bloom: Many years, often a decade or more – Agave tubulata is monocarpic and flowers only once in its life
- Flower Appearance: Yellow flowers carried along a tall flowering stalk, held well above the foliage
- Edibility: Ornamental – the flowers are not grown for eating, and agave sap and tissue are irritating when raw
Detailed Blooming Overview
After years of storing energy in its rosette of fleshy leaves, Agave tubulata finally sends up a single, dramatic flower stalk – the once-in-a-lifetime event behind the “century plant” name. The rosette pours everything into this bloom: yellow flowers open in spring to summer, carried along a tall flowering stalk, the plant sets seed, and then slowly dies, leaving a ring of offsets (pups) to take its place. It is the grand finale of a long life rather than a yearly display.
Flower Characteristics
- Colour: yellow.
- Form: small, tubular, nectar-rich flowers carried along a tall flowering stalk.
- Once only: the rosette is monocarpic – it blooms a single time, sets seed, then dies while the offsets carry on.
Bloom Care & Thinning
- Managing the bloom: there is no fruit-style thinning to do – once the stalk emerges the rosette is committed. Let it flower, then cut back the spent stalk and the dying rosette and leave the pups to grow on in its place.
- Support and space: the flower stalk can reach several metres and become top-heavy, so give it room and stake it in exposed positions.
- Pollination and seed set: in the wild the nectar-rich flowers are pollinated mainly by bats, hawk moths and hummingbirds; leave the stalk in place if you want ripe seed, or simply lift and replant the offsets around the base.
- Safe handling: the sap and cut tissue can irritate skin and eyes and the leaf tips are sharply spined, so wear gloves and eye protection when cutting the flower stalk or clearing the old rosette.
Bloom Health & Protection
- Agave snout weevil: large, mature plants near flowering age are the classic target of the agave snout weevil, whose grubs tunnel into the core and can collapse the rosette. What helps: keeping plants vigorous and unstressed, removing any affected plant promptly, and, where pressure is high, a soil-applied systemic insecticide.
- Crown and heart rot: in cold, wet spells water sitting in the crown can trigger rot around the base of the emerging stalk. What helps: sharp drainage and keeping the heart dry, with a copper-based fungicide if rot takes hold.
Pruning, Training & Seasonal Maintenance
Agave tubulata tolerates almost no routine pruning: it grows as a single rosette from one growing point, so the only appropriate cuts are removal of fully dead or damaged leaf tissue, plus a one-time clean-up of the flowering stalk and spent rosette once this monocarpic species blooms and dies. There is no season that forces pruning here – in its warm, frost-free range (hardiness zone 9-11) dead leaves can be trimmed any time of year – and cutting does not affect future flowering or size, since the rosette’s size and single bloom are already fixed by its own growth cycle. Removing green or part-green leaf tissue wastes stored reserves and wounds the exact spot most vulnerable to rot and pests, so restraint matters more than technique.
Quick Pruning & Maintenance Specs
| Pruning Tolerance |
Low (single growing point; only fully dead tissue is safely removable) |
| Primary Pruning Window |
Any time a lower leaf is fully brown and dry (all-year in zone 9-11) |
| Secondary Maintenance Window |
After the bloom stalk and mother rosette finish dying back post-flowering |
| Typical Frequency |
Occasional – a few dead leaves a year, plus one end-of-life clean-up |
| Main Objective |
Remove spent or dead tissue only; make room and light for offsets |
| Young Plant Priority |
Leave all green leaf tissue untouched; do not cut for shape |
| Mature Plant Priority |
Trim fully dead lower leaves; after bloom, remove the spent stalk and dying rosette at the base |
| Best Tool Type |
Bypass secateurs for leaves; loppers or a small pruning saw for the thick, hardened 1.5-2m stalk |
| Avoid Heavy Pruning During |
Always – this species has no tolerance for structural or rejuvenation pruning |
Pruning by Plant Age & Size
Newly Established
Do not prune. Only remove leaf tissue damaged in transplant or shipping, cutting back to clean tissue right at the leaf base.
Young / Formative
No structural training applies – Agave tubulata forms one symmetrical rosette unaided; there is nothing to stake, head back, or shape.
Mature / Established
Routine tidying is limited to fully brown lower leaves. Once the rosette sends up its 1.5-2m flowering stalk, that is the plant’s final act; pruning then shifts entirely to end-of-life clean-up rather than maintenance.
Special Growth to Remove
- Spent flowering stalk: once flowering and any seed-set finish and the stalk has dried, cut it at the base – it serves no further purpose and its height and weight make it a hazard if left standing.
- Dying mother rosette: the parent rosette dies after flowering; remove it once fully brown, but leave it while still partly green or turgid, as it may still be shifting reserves back into the base.
- Offsets (pups): this monocarpic species continues only through its basal offsets – retain them; divide or remove only if the clump becomes overcrowded.
Container & Small-Space Pruning
The same dead-tissue-only rule applies in containers, but Agave tubulata is a large agave at maturity (leaves to 120cm, stalk to 2m), so it cannot be kept compact by cutting – size up the container before it is rootbound rather than pruning for size. Once a flowering stalk starts extending, check that a top-heavy pot is stable.
Tools
Bypass secateurs for individual dead leaves cut close to the base; loppers for the thicker basal tissue of a dried stalk; a pruning saw for the woody base of a mature stalk too thick for loppers.
Tool Hygiene & Disease Risk
Increased risk: agave snout weevils are attracted to fresh wounds at the crown and base to lay eggs, and cuts into damp basal tissue can open the door to bacterial or fungal crown rot. Use clean tools, avoid working at the base in wet conditions, and never wound the crown itself.
Cut Placement & Technique
Cut dead leaves close to the base without slicing into the crown; cut the spent stalk near ground level once it is fully dry and no longer supporting green tissue; remove a large stalk in staged sections rather than as one heavy overhead cut.
Heavy Pruning & Rejuvenation
Not tolerated. There is no rejuvenation pruning for this species – a damaged or beheaded crown will not regenerate a new rosette, since the single growing point is destroyed. The clump’s future lies entirely with its offsets, not with hard-pruning the mother plant.
Post-Pruning Care
No fertilizing after leaf or stalk removal. In humid or rainy weather let cut surfaces dry rather than watering directly onto a fresh wound, and watch the cut base for soft, discolored tissue that could signal rot or weevil entry.
Common Pruning Mistakes
- Cutting part-green leaves for a tidier look, which wastes stored reserves.
- Leaving the heavy dried stalk standing indefinitely as a fall hazard.
- Slicing into the crown while removing a low leaf.
- Assuming hard pruning can renew a rosette that is already declining after bloom.
When NOT to Prune
- Never into the crown.
- Not while the flower stalk is still green and actively blooming – let flowering and any seed-set finish.
- Not immediately after transplanting, until the plant is re-established.
Recommended Tools (by task)
- Mature plant, routine dead-leaf removal, small basal cuts → bypass_secateurs: a single clean cut at the leaf base without crushing surrounding tissue.
- Mature plant, spent 1.5-2m flower stalk once dried and hardened → loppers: needed for the stalk’s diameter at that stage.
- Any cut near the crown or base → blade_disinfectant: reduces the chance of introducing crown rot or attracting snout weevils to a fresh wound.
Pests, Diseases & Troubleshooting
Overview: Agave are tough, sun-loving succulents that stay largely trouble-free when grown lean and dry, but the fleshy, water-storing tissue of an agave of uncertain identity under this name makes it vulnerable to rot and to a handful of specialist pests once conditions turn wet or crowded. The single most damaging problem across the genus is the agave snout weevil, whose grubs tunnel into the core and open the door to fatal bacterial soft rot; this species is a moderate weevil target that benefits from routine crown checks. Management is overwhelmingly cultural — sharp drainage, careful watering, airflow and prompt removal of collapsing tissue — with sprays or drenches reserved for confirmed problems.
Quick Troubleshooting Overview
| Issue / Pest |
Main Symptom |
Primary Solution |
| Agave snout weevil |
Base of rosette softens; outer leaves fold down and collapse; grubs in the core |
Preventive drench of susceptible plants; dig out & destroy infested ones |
| Crown / root rot |
Central leaves blacken and pull out easily; mushy, foul-smelling base |
Improve drainage, withhold water, cut back to clean tissue |
| Scale & mealybugs |
Sticky honeydew, sooty mould, cottony tufts or hard bumps in leaf axils |
Wipe/spray with horticultural oil or insecticidal soap; treat roots for root mealybug |
| Agave & spider mites |
Corky scarring or fine stippling and webbing in the folds of new leaves |
Improve airflow, rinse foliage; miticide or oil for severe cases |
| Sunburn / etiolation |
Bleached tan patches (too much sun) or pale, stretched, floppy growth (too little) |
Acclimatise to light gradually; bright light with midday shade in fierce heat |
| Overwatering / cold |
Translucent mushy leaves, basal rot, or frost-scarred tips |
Water sparingly; protect from hard frost and wet cold |
Common Pests & Management
- Agave snout weevil (Scyphophorus acupunctatus):
- Symptoms: The adult is a dull black, long-snouted beetle about 1–2 cm long that chews into the base of the rosette to lay eggs. The real damage is done by pale, legless grubs tunnelling through the core and introducing bacteria as they feed. Watch for outer leaves that suddenly wilt, fold downward and lie flat, a base that feels soft or spongy, and a collapsed centre that lifts out with little resistance — by then the plant is usually lost. Medium, fleshier plants are attacked with moderate frequency.
- Prevention & Control: Prevention is everything: keep plants unstressed, avoid wounding the base, and clear away spent or rotting tissue that attracts egg-laying adults. Inspect the crown regularly during warm growing weather. Dig out and destroy any plant that is already collapsing to stop the grubs — and the rot bacteria they carry — spreading to neighbours. For valued specimens where the weevil is known, a preventive soil drench with a systemic insecticide labelled for the pest, applied at the start of the warm season, is the main chemical option; there is no reliable cure once the core is destroyed.
- Armored & soft scale (Diaspididae & Coccidae):
- Symptoms: Small, immobile brown, grey or tan bumps or flattened discs cluster along the leaves, in the folds and on the undersides. Soft scale excrete sticky honeydew that leaves foliage shiny and encourages black sooty mould; armored scale do not, but cause yellow or bleached spots and pitting where they feed. Heavy colonies weaken and disfigure the rosette.
- Prevention & Control: Rub off light infestations with a cloth or soft brush dipped in soapy water, and isolate new plants until you are sure they are clean. Encourage natural enemies (ladybirds, parasitic wasps) by avoiding broad-spectrum sprays. For persistent scale, thorough coverage with horticultural oil or insecticidal soap smothers them; repeat every couple of weeks and treat in the cool of the evening to avoid leaf scorch and to protect pollinators.
- Mealybugs, incl. root mealybugs (Pseudococcus/Planococcus spp. & Rhizoecus spp.):
- Symptoms: Foliar mealybugs look like small white, cottony tufts tucked into leaf axils and the tight centre of the rosette, often with honeydew and sooty mould. Root mealybugs are sneakier: white, waxy specks and a mould-like ‘ash’ on the roots and inner pot wall, showing as unexplained stalling, yellowing and slow decline even when the top looks clean — always check the root ball at repotting.
- Prevention & Control: Dab visible clusters with a cotton bud moistened in dilute rubbing alcohol, and hose or wipe out the crown. Quarantine new arrivals and inspect roots when repotting. For root mealybug, bare-root the plant, wash the roots, discard the old soil and repot into fresh gritty mix; a soil drench of insecticidal soap or a systemic can follow. Oil and soap sprays handle the foliar form; keep ants away, as they farm and spread mealybugs.
- Eriophyid agave mite (Aceria sp.):
- Symptoms: This microscopic mite feeds hidden in the tightly furled heart of the rosette, so damage only shows as new leaves expand: rough, corky scarring, pimpling, distorted margins and streaks of tan, russeted tissue along the young leaves. It is easily mistaken for physical or edema damage. Once leaves harden the scars are permanent but no longer spreading.
- Prevention & Control: Because the mite hides in the growing point, prevention centres on hygiene and isolation of new stock, since it spreads plant-to-plant by contact. Remove and destroy badly deformed leaves to knock the population back. Miticides or horticultural oil worked into the crown help on valued plants, but repeat applications are needed and results are only partial — many growers simply cull heavily infested plants to protect a collection.
- Spider mites (Tetranychus spp.):
- Symptoms: Spider mites thrive in hot, dry, dusty, still air. Look for fine pale stippling or a sandblasted, silvery cast on the leaves and, in bad cases, delicate webbing in the leaf folds and between spines. They are tiny — tap a leaf over white paper to see the specks move.
- Prevention & Control: Raise humidity and airflow and periodically rinse the plant to knock mites and dust off — a hostile environment does most of the work. Avoid drought-stressing the plant. Insecticidal soap, horticultural oil or a labelled miticide clears persistent outbreaks; rotate products and repeat to catch newly hatched mites, and avoid broad-spectrum insecticides that kill the predatory mites keeping them in check.
- Thrips (Thysanoptera):
- Symptoms: Slender, fast-moving insects a millimetre or two long that rasp at soft tissue, leaving silvery or bronzed streaks flecked with tiny black specks of excrement and sometimes distorting new growth. They are more of a cosmetic nuisance on tough agave leaves but can scar young foliage.
- Prevention & Control: Blue or yellow sticky traps help monitor and reduce adults. Keep the surrounding area weed-free, as thrips move in from nearby vegetation. Insecticidal soap, horticultural oil or spinosad give good control; treat in the evening to spare pollinators, and repeat to break the life cycle.
Diseases & Fungal Issues
- Phytophthora / Pythium crown & root rot (Phytophthora & Pythium spp.):
- Symptoms: The classic killer of over-watered agave. Roots turn brown and mushy, the base softens, and central leaves discolour, blacken and pull out easily from a rotten core. It strikes fastest in cold, wet, poorly drained soil.
- Treatment & Management: This is a cultural problem first: plant in fast-draining, gritty mix, never let agave sit in waterlogged soil, and water much less in cool weather. Caught early, unpot the plant, cut away all soft brown tissue back to firm healthy flesh, let the wound callus dry, and repot into fresh dry mix. A soil drench with a fungicide effective against water-moulds can support recovery, but drainage and restraint with the watering can are far more reliable.
- Bacterial soft rot (Pectobacterium / Erwinia spp.):
- Symptoms: Fast-spreading, foul-smelling wet rot that turns tissue into a slimy, collapsing mush, often starting from a wound, a weevil tunnel or a cold-damaged spot. It is distinguished from fungal rot by its speed and strong sour odour.
- Treatment & Management: There is no cure for badly affected tissue — cut well back into clean, firm flesh with a sterilised blade (disinfect between cuts), remove all slime, and let the wound dry hard. Keep the plant dry and airy while it heals. Prevent it by avoiding injury, controlling the snout weevil, protecting from frost, and never overhead-watering into the crown.
- Anthracnose (Colletotrichum agaves):
- Symptoms: Sunken, dark brown to black lesions on the leaves, often with a slightly moist look and, in humid weather, pinkish-orange spore masses in the centre of the spots. It favours warm, wet, crowded conditions and spreads rapidly by splashing water.
- Treatment & Management: Improve airflow and spacing, avoid wetting the foliage, and remove and destroy infected leaves promptly, disinfecting tools afterwards. Where pressure is high a copper-based or other labelled fungicide applied protectively helps, but keeping the foliage dry and the plant uncrowded is the core defence.
- Fungal leaf spots (Cercospora, Colletotrichum & others):
- Symptoms: Assorted round to irregular grey, brown or black spots and blotches, sometimes ringed or haloed in yellow — mostly cosmetic but disfiguring, and worse in prolonged damp or under overhead watering.
- Treatment & Management: Water at the base and early in the day so leaves dry quickly, give the plant sun and air movement, and pick off badly spotted leaves. Routine fungicide is rarely needed on a well-sited plant; copper or a broad-spectrum fungicide is an option only under persistent wet pressure.
Growing Difficulties & Abiotic Problems
- Overwatering & rot:
- Cause & Symptoms: By far the commonest way to kill an agave. Too-frequent watering, heavy soil or a pot with no drainage leads to translucent, yellowing, mushy lower leaves and a soft base — the prelude to root and crown rot.
- Correction Strategy: Grow it hard: use a very free-draining, mineral-rich mix, let the soil dry out fully between waterings, and water much less in cool or dormant periods. Ensure every pot drains freely and never leave the plant standing in a saucer of water.
- Sunburn / scorch:
- Cause & Symptoms: Sudden exposure to intense sun — especially after cloudy spells, a move outdoors, or under glass — causes permanent bleached tan or white patches, sometimes with dry scarring, on the most exposed leaf faces.
- Correction Strategy: Acclimatise plants to strong light gradually over one to two weeks, and provide light shade during the fiercest midday heat in hot climates. Scorched tissue will not recover but is outgrown as new leaves form.
- Frost & cold damage:
- Cause & Symptoms: Depending on the plant’s hardiness, frost causes water-soaked, then brown or black, mushy patches and scarred leaf tips; wet cold is far more damaging than dry cold, and cold injury frequently opens the door to bacterial soft rot. As with most agave, this species tolerates dry cold and brief light frost far better than prolonged wet cold.
- Correction Strategy: Keep plants dry through cold spells, improve drainage, and give overhead protection or move containers under cover when hard frost threatens. Do not cut cold-damaged tissue until active growth resumes and the extent of the damage is clear, then trim back to clean flesh.
- Etiolation & edema:
- Cause & Symptoms: Too little light produces pale, soft, elongated growth with widely spaced, weakly formed leaves (etiolation). Erratic watering under cool, humid, low-light conditions can cause edema — corky, blistered bumps on the leaf undersides where cells burst from taking up water faster than they lose it.
- Correction Strategy: Give the plant as much bright light as it can take (acclimatising to avoid scorch) to keep growth tight and symmetrical. For edema, steady the watering and improve airflow and light, avoiding water in cool damp conditions; the corky marks are permanent but harmless and stop forming once conditions are corrected.
What Helps — Products & Tools
For this succulent the toolkit stays simple and gentle: horticultural (mineral) oil and insecticidal soap for scale, mealybugs, mites and thrips; dilute rubbing alcohol on a cotton bud for spot-treating mealybugs; a labelled miticide for stubborn spider or agave mite; blue/yellow sticky traps for monitoring thrips; and a systemic insecticide drench reserved for preventing agave snout weevil on valued or susceptible plants. On the disease side, a sharp sterilised knife and dry, airy conditions matter more than any spray, backed by a copper-based fungicide for anthracnose and leaf spot and a water-mould fungicide drench for early root rot. Above all, a gritty free-draining mix and a restrained watering can are the best ‘products’ you can give an agave.
Propagation Guide
Agave tubulata is best increased from its own basal offsets, which grow true to the parent, while seed is reserved for raising the plain species and cuttings serve as a backup when no offset is on hand. Offset division is easy; leaf cuttings and seed both demand more patience given this plant’s naturally slow growth rate.
Quick Propagation Specs
| Best Propagation Method |
Basal offsets (daughter plants) / division |
| Alternative Methods |
Leaf or basal-stem cuttings; seed (species form) |
| Propagation Difficulty |
Easy (offsets); Moderate (leaf cuttings and seed) |
| Seed True-to-Type |
Usually true-to-type for the species; variegated forms do not come true |
| Vegetative True-to-Type |
Yes |
| Best Propagation Season |
Late spring to early summer outdoors; indoor propagation possible year-round |
| Cutting Rooting Time |
A few weeks to about a month |
Growing from Seed
Seed grows the straight species but not named or variegated selections. Sow into a gritty, well-drained mix in a warm, bright position and keep only lightly moist, never waterlogged; given the plant’s slow growth habit, seedlings take a long time to bulk up.
Stem Cuttings
Cutting Type
A basal offset or a section cut at the base of the stem, removed by hand rather than with a blade.
Best Timing
Best started outdoors from late spring into early summer; indoors it can be attempted at any time.
Cutting Preparation
Cut at the base of the leaf or stem and let the wound callus for at least 24 hours (a stem cutting needs a bit longer) before potting, so the tissue heals over and the cutting resists rot.
Rooting Setup
Pot the callused cutting into well-drained soil and water every few days to two weeks, letting the mix dry somewhat between waterings but never fully.
Rooting Time
Rooting generally begins within a few weeks to about a month.
Leaf & Root Cuttings
A single leaf can be removed by hand and treated the same as a stem cutting: callus at least 24 hours, then set the base into well-drained soil and water sparingly. This method is slower and less dependable than working from an offset.
Division, Offsets, Pups & Suckers
Basal daughter plants are the most reliable way to reproduce this plant exactly, including any variegated selection, since that trait is lost from seed. When a pup has grown its own roots, wash the soil from the root ball and separate it with as much root as possible, water lightly every day just after transplanting, then ease off, being careful never to overwater.