Care Guide: Planting, Soil & Watering
Overview: This agave is a tough, drought-tolerant succulent that thrives in full sun to light shade and needs lean, fast-draining, sandy or gritty soil. It stores water in its fleshy leaves, so it wants only occasional deep watering, resents sitting in wet ground, and is best kept frost-free or protected in colder zones.
Quick Care Requirements
| Requirement |
Ideal Condition |
| Planting Season |
Spring in colder zones (8); spring–summer in zone 9–10a; spring–autumn in zone 10b; year-round in zone 11+ |
| Growth Rate |
Slow |
| Soil Type |
Well-draining and sandy or gritty; a lean cactus/succulent mix rather than rich, moisture-holding soil |
| Water Need |
Low – let the soil dry out fully between waterings |
Planting & Establishment
- Best Planting Season: Plant in spring in the coldest zones it tolerates (8), from spring through summer in zone 9–10a, spring through autumn in zone 10b, and year-round in frost-free zone 11+. In cold-winter areas wait until the danger of frost has passed and the soil has warmed.
- How to Plant:
- Hole Preparation: Dig a hole about twice the width of the root ball but no deeper, choosing a spot with excellent drainage. In heavy or rainy ground, plant on a mound or raised bed so the plant never sits in a puddle – standing water quickly rots and kills agaves.
- Soil Amendments: Work coarse sand, grit or pumice into the native soil to sharpen drainage; avoid heavy feeding or rich, water-retentive compost. These plants want poor, fast-draining ground.
- Planting Depth: Set the plant so the root collar sits right at soil level – never bury the base of the leaves or the stem, which traps moisture and invites crown rot.
- Growth Speed & Expectations: Expect slow, steady growth. Grown in climates cooler than its native range the leaves develop a little more slowly and flowering can take several extra years, so treat it as a long-term, low-maintenance specimen.
Soil, Watering & Drainage Care
- Soil Mix & Drainage Needs: Grow in a gritty, free-draining medium – a cactus/succulent blend, or garden soil opened up with sand and grit. In containers use a pot with plenty of drainage holes, and refresh the mix every few years as it breaks down and drains less freely. Sharp drainage is the single most important factor in preventing root and crown rot.
- Watering Schedule & Technique:
- Young / Newly Planted: Water lightly but regularly for the first few weeks to help the roots settle in, always letting the surface dry before watering again.
- Established: Once settled, water deeply but infrequently and only when the soil has dried right out. Overwatering is far more dangerous to an agave than underwatering.
- Seasonal Adjustments: Water a little more often during hot, dry spells, and cut right back in winter when the plant is barely growing – keep it dry in cold weather, and add a little mulch around young plants heading into a cold winter for protection.
Growing in Pots, Balconies & Indoors
Agave weberi is an architectural succulent that does very well in a free-draining pot on a sunny patio or balcony. The grower does not rate it as a true indoor houseplant – it needs strong, direct sun – but a young or compact plant can sit on a bright, sunny windowsill, where it stays smaller and is unlikely to flower.
Quick Details
- Container Size: A pot 30-50% larger than the root ball; pot up to a larger container each time it fills (the grower’s guidance)
- Indoor Suitability: Not a true houseplant; a young or compact plant can grow on a bright, sunny windowsill
- Best Spot: Full sun to light shade – outdoors or the brightest position you have
- Soil & Drainage: Gritty, free-draining cactus/succulent mix; plenty of drainage holes
- Watering in Pots: Water sparingly and let the mix dry out between waterings – never leave it soggy
Indoors & On the Windowsill
- Houseplant limits: The grower marks it as not an indoor houseplant – agaves need the full, direct sun that a room interior rarely provides, so indoors they stretch, lose colour and will not bloom.
- Windowsill growing: A young or compact plant can do well on the brightest, most direct sill you have (a south-facing window is ideal). Keep the sharply spined tips away from where people brush past.
- Overwintering indoors: Most agaves take only light frost, so in cold-winter climates grow yours in a pot and move it to a bright, frost-free spot (a cool porch, conservatory or sunny window) for the winter, kept nearly dry until warmth returns.
- Safety: Agave sap can irritate skin and eyes and the plant is toxic to cats and dogs, while the leaf tips are needle-sharp – site it well away from children, pets and walkways.
On a Balcony or Patio
- Light & heat: Give it the sunniest corner; agaves love the reflected heat from walls, railings and paving. Pots dry quickly there, but the plant is drought-tolerant – still check the mix and water only once it is dry.
- Bloom stalk & wind: When a mature plant flowers the stalk can be tall and top-heavy, so shelter it from strong wind and weight the base of the pot for stability.
- Weight & runoff: A large agave in a big pot is heavy – make sure a balcony can take the load, and stand the pot where drainage water can escape freely.
Choosing the Pot, Soil & Long-Term Care
- Pot & drainage: Use a pot about 30-50% bigger than the root ball with strong drainage holes; skip a standing saucer of water to avoid root rot. Terracotta is ideal because it breathes and dries fast, while glazed or plastic pots hold moisture longer.
- Potting mix: A gritty, fast-draining cactus and succulent mix – coarse sand, grit or perlite with only a little organic matter.
- Feeding: Agaves are adapted to poor soils and need little food; because nutrients leach from pots, a weak feed once during the growing season is plenty.
- Repotting: Pot up as the plant fills its container and to give offsets room; refresh the mix every couple of years – the grower notes that after a few years the old mix drains less freely and is best replaced.
Grower’s Container Tip
- Size up gradually: Choose a pot 30-50% larger than the root ball and step up a size each time the plant fills it.
- Leave room for pups: A mature agave needs a wider pot so its daughter plants (offsets) have space to form.
- Ballast the flower stalk: When it blooms the stalk can be heavy and top-heavy, so place something heavy in the base of the pot to stop it toppling.
- Refresh the soil: After a few years the mix drains less well, so replace it with fresh, gritty compost.
Bloom & Flower Guide
Quick Details
- Bloom Season: Summer
- Time to First Bloom: Once only, after many years of growth
- Flower Appearance: Yellow to green flowers clustered on a tall stalk
- Edibility: Ornamental – not a food crop
Detailed Blooming Overview
Agave weberi is a large, relatively soft-leaved agave. It follows the classic agave life cycle – many years as a rosette, then a single massive summer flower stalk, after which the rosette dies and offsets carry on.
Flower Characteristics
- Yellow-green flowers in umbel-like clusters along a tall flowering stalk
Bloom Care & Thinning
- One-time bloom: The towering stalk is the plant’s final act; leave it for pollinators, then remove it when spent.
- Pollination: Bats, moths, hummingbirds and other nectar-feeding birds visit the flowers in its native range.
Pruning, Training & Seasonal Maintenance
Known as maguey liso (“smooth maguey”), this species has notably smoother, less heavily armed leaf margins than most Agaves, which makes routine handling a little easier – but it makes up for that with one of the tallest flower stalks in the genus, reported at 3-6m (10-20ft). Pruning stays limited to hygiene throughout its life: dead-leaf removal at any time, and, once this monocarpic species flowers and dies, a genuinely large-scale job of taking down the stalk and spent rosette. The scale of that stalk, not the leaf spines, is the main safety consideration here.
Quick Pruning & Maintenance Specs
| Pruning Tolerance |
Low – leaf and stalk removal only |
| Primary Pruning Window |
Any time a leaf is fully dry; stalk removal, in stages, once bloom has finished and it has dried |
| Typical Frequency |
A few times a year for leaves; a major one-time job for the stalk |
| Main Objective |
Hygiene, plus safe, staged removal of an unusually tall bloom stalk |
| Young Plant Priority |
Leave the rosette intact; remove only dead leaf tissue |
| Mature Plant Priority |
Plan and stage the removal of a 3-6m stalk once spent |
| Best Tool Type |
Loppers and a pruning saw for the stalk; a pole pruner for the upper sections |
| Avoid Heavy Pruning During |
Always – no rejuvenation response exists |
Pruning by Plant Age & Size
Newly Established
Remove only leaf tissue that is already brown and dry; the relatively smooth margin makes this an easier, lower-risk task than on spinier Agaves.
Young / Formative
No structural training – single, non-branching rosette.
Mature / Established
Once mature enough to bloom, the plant sends up a stalk that can reach 3-6m; after flowering finishes, this becomes a genuine take-down project rather than routine tidying.
Seasonal Pruning Schedule
Ongoing Sanitary
Objective: tidiness. Remove only fully brown, dry leaves, allowing nutrient resorption first. No regrowth response occurs.
Post-Bloom / Rosette Decline
Objective: safe removal of a large, spent structure. Once the 3-6m stalk and mother rosette are fully dry, cut the stalk down from the top in stages rather than at the base in one motion, then remove the collapsed rosette. Leave offsets undisturbed.
Special Growth to Remove
- Dead, dry leaves – cut at the base.
- Spent flowering stalk – remove in stages once fully dry, working top-down.
- Dead mother rosette after bloom.
- Offsets/pups – retain for succession; thin only if crowded.
Container & Small-Space Pruning
Use a container roughly 30-50% larger than the root ball; up-pot as it fills. Given this species’ scale, a mature flowering specimen is generally impractical to keep contained – a 3-6m stalk on a potted plant is a serious tipping and safety hazard, so plan for eventual in-ground placement or stalk removal support rather than relying on the container alone.
Tools
Bypass secateurs for leaves; loppers and a pruning saw for the woody stalk base; a pole pruner for reaching and sectioning the upper stalk safely from the ground. Hedge shears are unsuitable for this plant’s selective cuts.
Tool Hygiene & Disease Risk
Increased risk: Agave snout weevil (a listed pest) can introduce bacterial soft rot through wounds. Disinfect blades after contact with soft or collapsing tissue and between plants.
Cut Placement & Technique
Cut leaves at the base without cutting into crown tissue. For the tall stalk, work from the top down in manageable sections using a pole pruner or saw, so no single heavy piece falls uncontrolled near the crown or bystanders.
Heavy Pruning & Rejuvenation
Not tolerated. A single-growing-point succulent has no framework to cut back for regrowth; crown damage is generally fatal.
Post-Pruning Care
No special aftercare beyond normal watering; skip post-pruning feeding. After a large stalk-removal job, clear cut debris promptly and check the base occasionally for weevil entry.
Common Pruning Mistakes
- Attempting to fell the full 3-6m stalk in one cut near the base instead of sectioning it from the top.
- Removing leaves while still partly green.
- Underestimating the weight and reach needed for this species’ unusually tall stalk.
- Stripping all offsets, leaving no successor rosette.
When NOT to Prune
Avoid removing leaves that are still partly green, cutting into the crown while functional leaves remain, or attempting to remove the stalk without a plan for its height and weight.
Recommended Tools (by task)
- loppers – the fibrous stalk base and thicker leaves.
- pruning_saw – the woody, dried stalk once it needs sectioning.
- pole_pruner – safely reaching and cutting the upper sections of this unusually tall (3-6m) flower stalk from the ground.
- blade_disinfectant – limits weevil-associated rot transfer.
Pests, Diseases & Troubleshooting
Overview: A large, nearly spineless soft grey-green agave; its size makes it a snout-weevil target while the smooth leaves show scale and mealybug easily. Across the genus, agaves are far more often lost to moisture and rot than to insects, so the guiding principle is cultural prevention — sharp drainage, restrained watering, generous airflow and regular inspection of the crown and leaf bases — with organic and cultural controls used before any chemical option.
Quick Troubleshooting Overview
| Issue / Pest |
Main Symptom |
Primary Solution |
| Agave snout weevil |
Rosette suddenly collapses and lifts free; grubs and rot in the base |
Remove and destroy infested plants; keep vigour moderate; preventive soil drench on high-value specimens |
| Scale & mealybugs |
Sticky honeydew, sooty mould, white cottony masses in leaf axils and on roots |
Wipe/spray with horticultural oil or insecticidal soap; treat root mealybugs at repotting |
| Agave mite & spider mites |
Corky scarring, distorted new growth, fine stippling and webbing |
Discard heavily distorted leaves; miticidal oil; raise humidity for spider mites |
| Crown & root rot |
Soft, brown, foul base; leaves collapse from the centre outward |
Improve drainage, withhold water, cut to clean tissue; the plant died of wet, not disease alone |
| Bacterial soft rot |
Slimy, foul-smelling collapse of tissue, often after cold or injury |
Cut out all mush to clean tissue, dry hard, improve airflow and sanitation |
| Sunburn / cold & edema |
Bleached patches, mushy frost spots, or corky bumps on undersides |
Acclimatise to sun, protect from frost, and avoid overwatering in cool dull weather |
Common Pests & Management
- Agave snout weevil (Scyphophorus acupunctatus):
- Symptoms: Sudden wilting, greying and inward collapse of the rosette; leaves loosen and the whole plant can be lifted free by hand as C-shaped white grubs and secondary bacterial rot destroy the base and heart. Adults are dark 1–1.5 cm snout beetles that puncture the crown to lay eggs. Large, mature rosettes approaching flowering size are the preferred, highest-risk targets. The damage is often noticed only once collapse is advanced, as the grubs feed hidden inside the crown and base.
- Prevention & Control: There is no reliable rescue once grubs are inside, so prevention rules: avoid over-lush, over-fertilised growth that attracts egg-laying females, and inspect the crown of large plants. Promptly dig out and destroy (bag, do not compost) any collapsing plant along with the grubs and surrounding soil to break the cycle. On high-value specimens a preventive soil drench of a systemic insecticide in the warm season is the accepted last resort — follow the label and protect pollinators.
- Armored & soft scale (e.g. Diaspididae and Coccus spp.):
- Symptoms: Immobile brown, grey or tan discs (armored) or plumper honeydew-producing bumps (soft scale) clustered along leaf bases, undersides and the spine; soft scale leaves sticky honeydew and black sooty mould. Heavy infestations cause yellow flecking and weaken the plant.
- Prevention & Control: Inspect new plants before introducing them and isolate any suspects. Rub off light infestations with a cloth or a cotton bud dipped in dilute alcohol. For wider spread, coat thoroughly with horticultural/mineral oil or insecticidal soap, which smother the insects; repeat every 1–2 weeks. Encourage ladybirds and parasitic wasps outdoors. Spray oils in the cool of the evening to avoid leaf scorch.
- Mealybugs, including root mealybugs (Pseudococcus / Rhizoecus spp.):
- Symptoms: White, cottony tufts tucked into leaf axils, the crown and along the spine, with honeydew and sooty mould. Root mealybugs are hidden white waxy deposits on the roots and inner pot wall that cause unexplained stalling, yellowing and poor growth despite correct care.
- Prevention & Control: Spot-treat foliage colonies with an alcohol-dipped swab, then follow with horticultural oil or insecticidal soap, repeating to catch the protected crawlers. For root mealybugs, bare-root the plant, wash the roots, discard the old mix, and repot into fresh gritty soil in a clean pot; a soil drench of oil or a systemic is the escalation for stubborn cases. Quarantine incoming plants.
- Agave (eriophyid) mite (Aceria / eriophyid spp.):
- Symptoms: Corky, scabby scarring and pinkish streaks toward the centre of the rosette, with twisted, distorted, stunted new leaves that never flatten out. The mites are microscopic and live deep in the unfurling crown, so damage is seen before the pest is.
- Prevention & Control: Remove and destroy badly distorted leaves and isolate the plant, as this pest spreads plant-to-plant and on tools and hands. Repeated applications of horticultural oil or sulfur into the crown help suppress it; severely deformed collector plants are often best discarded to protect the collection.
- Spider mites (Tetranychus spp.):
- Symptoms: Fine pale stippling and a dull, bronzed cast to the leaves, with very fine webbing in the crown and along spines in hot, dry, dusty conditions — common on plants under cover or against hot walls.
- Prevention & Control: Raise humidity and hose or wipe down foliage to knock mites off and clear dust; they thrive on stressed, dusty plants. Treat with horticultural oil or insecticidal soap on the undersides and crown, repeating every few days to break the fast life cycle. Avoid broad-spectrum insecticides that kill the predatory mites that keep them in check.
- Thrips (Thysanoptera, e.g. Heliothrips spp.):
- Symptoms: Silvery-grey scarring and tiny black faecal specks on leaf surfaces, sometimes with faint distortion of new growth; slender, fast-moving insects visible when the crown is disturbed.
- Prevention & Control: Keep plants unstressed and clear of weedy hosts nearby. Blue or yellow sticky traps monitor and reduce adults; horticultural oil or insecticidal soap applied to the crown and leaf faces controls active feeding. Thrips are usually cosmetic on a healthy agave, so tolerate light damage.
Minor note: soft-leaved and small seedling agaves can also be grazed by snails and slugs, which rasp shallow scars into tender leaves at night; hand-pick after dark, remove damp hiding places, and use iron-phosphate bait if needed.
Diseases & Fungal Issues
- Crown & root rot (Phytophthora and Pythium spp.):
- Symptoms: The commonest killer of agaves. Leaves at the centre yellow, soften and collapse from the base; the crown and roots turn brown, mushy and foul, almost always after wet soil, poor drainage or a buried crown.
- Treatment & Management: This is a culture problem first — plant high in fast-draining gritty mix, never bury the crown, water sparingly and only when the soil is dry, and ensure pots drain freely. Cut away all soft tissue to clean, firm flesh, dust with sulfur, and let it callus dry; a soil drench of a phosphonate/copper fungicide can protect remaining tissue. Salvage healthy offsets if the mother is lost.
- Bacterial soft rot (Pectobacterium / Erwinia spp.):
- Symptoms: Rapid, slimy, foul-smelling collapse of leaf bases or the crown into a wet brown mush, typically following frost injury, sunscald wounds, or snout-weevil damage that lets bacteria in.
- Treatment & Management: Excise all affected tissue back to clean, firm flesh with a blade sterilised between cuts, then keep the wound dry and airy until it callus over. Avoid overhead watering and cold-wet conditions, and prevent the injuries (frost, weevil) that open the door. There is no chemical cure once it is advanced — sanitation and dryness are the tools.
- Anthracnose (Colletotrichum agaves):
- Symptoms: Sunken, dark or reddish-brown lesions on the leaves, often with pinkish spore masses in the centre in damp weather; worst on crowded, humid, overhead-watered plants. Softer-leaved species like this one show fungal leaf spotting and anthracnose more readily than stiff desert agaves, so keep foliage dry and airy.
- Treatment & Management: Remove and destroy affected leaves, improve spacing and airflow, and water at the base in the morning so foliage dries quickly. A copper fungicide protects new growth during prolonged damp spells. Sanitise tools between plants.
- Fungal leaf spots (Cercospora, Coniothyrium and others):
- Symptoms: Round to oval grey, brown or black spots, sometimes ringed or with a yellow halo, mostly cosmetic but disfiguring on ornamental rosettes and worse in humid, still, wet conditions.
- Treatment & Management: Cultural control is usually enough — more sun and airflow, dry foliage, and removal of spotted leaves. Copper or sulfur fungicide is reserved for persistent, spreading cases. Choose clean, unblemished plants when buying.
Growing Difficulties & Abiotic Problems
- Overwatering & rot (the number-one killer):
- Cause & Symptoms: Soggy, poorly drained soil, a pot without drainage, or frequent watering leaves the roots and crown standing wet; leaves go translucent, soft and yellow and the base blackens. Agaves store their own water and are built for drought.
- Correction Strategy: Use a sharp, gritty, fast-draining mix, plant slightly high, and water only when the soil has dried, much less in cool or dormant weather. Empty saucers; never let the plant sit in water. When in doubt, wait — underwatering is far easier to fix than rot.
- Sunburn / sunscald:
- Cause & Symptoms: Bleached, tan or papery patches on the most exposed leaf faces after a sudden move into full sun, reflected heat, or glass. The scarring is permanent on that leaf, though the plant recovers with new growth.
- Correction Strategy: Acclimatise plants gradually when moving from shade or indoors to full sun, and give young or recently moved plants light afternoon shade or 30% shade cloth in the fiercest heat. Do not press cold glass or reflective surfaces against the leaves.
- Frost & cold damage:
- Cause & Symptoms: Freeze or hard cold causes water-soaked, then mushy or scarred patches, collapsed outer leaves, and an open door for soft rot; damage often shows a few days after the cold event.
- Correction Strategy: Keep plants dry going into cold, as dry tissue tolerates far more chill than wet tissue; protect with frost cloth or move containers under cover during hard freezes. Leave damaged leaves in place until danger passes, then trim to clean tissue and let wounds dry.
- Etiolation & edema:
- Cause & Symptoms: Too little light stretches the rosette into a loose, pale, weak-leaved shape (etiolation) that never fully recovers its form; overwatering in cool, dull weather causes edema — corky bumps or blisters on leaf undersides as cells burst from water uptake outpacing transpiration.
- Correction Strategy: Give the plant its full sun requirement (moving it into stronger light gradually) so new growth is tight and firm, and cut watering right back in cool, low-light, humid spells to stop edema. Improve airflow around the plant.
What Helps — Products & Tools
For this agave the useful kit is small and mostly organic: horticultural / mineral oil and insecticidal soap for scale, mealybugs and mites; isopropyl-alcohol swabs for spot-treating mealybugs and scale; sulfur or copper fungicide for anthracnose and leaf spots and to dust cut rot wounds; blue/yellow sticky traps to monitor thrips; iron-phosphate bait for slugs and snails on soft-leaved plants; and, only for high-value specimens against the snout weevil, a systemic soil-drench insecticide used preventively per label. A sharp, gritty, free-draining mix and a clean sterilised blade are the most important tools of all. Always follow label directions and protect pollinators — apply oils in the cool of the evening.
Propagation Guide
Agave weberi (‘maguey liso’) is a vigorous grower that readily produces basal offsets, making offset division the easiest and most practical propagation method; basal/leaf cuttings and seed also work. Overall difficulty is Easy to Moderate – easy where offsets are available, a little more patience-testing from seed or cuttings.
Quick Propagation Specs
| Best Propagation Method |
Offset (pup) division |
| Alternative Methods |
Basal/leaf cuttings; seed |
| Propagation Difficulty |
Easy (offsets) / Moderate (seed or cuttings) |
| Seed True-to-Type |
Usually true-to-type (species seed) |
| Vegetative True-to-Type |
Yes |
| Best Propagation Season |
Late spring to early summer outdoors; indoors any time |
| Cutting Rooting Time |
A few weeks to about a month |
| Germination Temperature |
Warm room conditions, roughly 21–27°C (70–80°F) |
Growing from Seed
Sow seed shallowly in a well-drained, sandy or gritty mix and keep it lightly moist in a warm, bright spot; germination typically takes several weeks.
Leaf & Root Cuttings
A leaf, or a basal cutting taken where a leaf or stem joins the plant, can be removed by hand and left to callus for at least 24 hours (longer for a thicker basal or stem cut) before being set into well-drained soil. Water every few days to two weeks, letting the mix dry somewhat between waterings without ever letting it go fully dry; rooting typically begins within a few weeks to about a month, best started in late spring to early summer, though it can be done indoors year-round.
Division, Offsets, Pups & Suckers
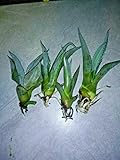
This species offsets fairly readily, forming clumps of pups around the base of the mother rosette. Let each pup size up, ideally with roots of its own, before separating it. When transplanting an offset or mature plant, wash the soil away from the roots, keep as much of the root system intact as possible, plant into well-drained soil, and water lightly every day at first without overwatering until established.