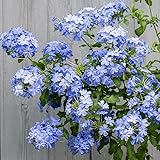
Care Guide: Planting, Soil & Watering
Overview: Plumbago thrives in full sun to light shade in light, well-draining soil, and once established it is notably drought tolerant. It needs only low to moderate watering and prefers soil that dries out between drinks rather than staying constantly wet.
Quick Care Requirements
| Requirement |
Ideal Condition |
| Planting Season |
Spring through autumn, ideally in spring after the last frost once the soil has warmed |
| Growth Rate |
Moderate to fast |
| Soil Type |
Light, well-draining soil; tolerates poor and sandy ground |
| Water Need |
Low to moderate — drought tolerant; let the soil dry between waterings |
Planting & Establishment
- Best Planting Season: Plant in spring once the danger of frost has passed and the soil has warmed; within its frost-free range it can also go in through summer and autumn. Establishing in the warm season lets the roots settle before cooler weather.
- How to Plant:
- Hole Preparation: Dig a hole about twice as wide as the root ball and just as deep, loosening the surrounding soil so young roots can spread easily.
- Soil Amendments: Mix a little compost or well-rotted organic matter into the backfill to feed the plant and improve drainage; lighten heavy clay with added grit or coarse sand.
- Planting Depth: Set the plant so the top of the root ball sits level with the surrounding soil — keep the root collar at grade and never bury the stem.
- Growth Speed & Expectations: A vigorous grower that puts on height quickly in warm conditions, filling out into a mounding shrub or scrambling climber within a season or two.
Soil, Watering & Drainage Care
- Soil Mix & Drainage Needs: Provide light, airy, free-draining soil; in containers use a quality free-draining potting mix and make sure the pot drains freely, as soggy soil invites root rot.
- Watering Schedule & Technique:
- Young / Newly Planted: Water regularly after planting to settle the roots, keeping the soil lightly moist while the plant establishes over the first few weeks.
- Established: Once established, water deeply but infrequently, letting the top few centimetres of soil dry out before watering again — it copes well with dry spells.
- Seasonal Adjustments: Increase watering during prolonged heat and cut right back in cool or wet weather; established plants need very little supplemental water in winter.
Growing in Pots, Balconies & Indoors
Plumbago is a vigorous, sun-loving shrub and scrambler – not a houseplant, but a superb large container plant for a hot patio or balcony, where it flowers for months. Indoors the light is far too weak; the real value of growing it in a pot is that a frost-tender plant can be moved under cover for winter.
Quick Details
- Container Size: A large, sturdy pot – this is a big shrub (1-3 m / 3-9 ft), so give it room and pot up as it grows
- Indoor Suitability: Not a houseplant (the grower marks it “No”); a full-sun plant that turns leggy and flowerless in indoor light
- Best Spot: Full sun to light shade, warm and sheltered
- Soil & Drainage: Open, free-draining potting mix; strong drainage holes
- Watering in Pots: Moderate – drought tolerant once established, but pots dry faster; water in heat, ease off in cool weather
Indoors & On the Windowsill
- Houseplant limits: The grower marks it as not suitable indoors. It needs full sun and grows lax and shy-flowering in the low light of a room.
- Overwintering indoors: This is the main reason to pot it. In cold climates it is frost-tender, so move the container into a bright, frost-free room, porch or conservatory for winter, cut back on watering, and return it outdoors once frost has passed.
On a Balcony or Patio
- Light & wind: Give it the hottest, sunniest wall – it loves reflected heat. As a lax scrambler it benefits from a trellis, obelisk or tie-in, and some shelter from strong wind.
- Practicalities: A big pot of Plumbago is heavy – stand it where you won’t need to move it far, and raise it on pot feet so water drains away.
Choosing the Pot, Soil & Long-Term Care
- Pot & drainage: A large pot with strong drainage holes; skip a standing water saucer to avoid root rot. Terracotta breathes and dries faster; glazed or plastic holds moisture longer.
- Potting mix: An open, aerated organic mix – for example coir or peat with perlite.
- Feeding: Potted plants use up their food fast and nutrients leach out – feed regularly through the growing season for continuous bloom.
- Pruning & repotting: Prune hard in the cool/dormant season to keep it shapely and within the pot; pot up or refresh the mix every couple of years.
Safety
- Irritant sap: Plumbago sap and leaves can irritate skin and are mildly toxic if eaten – keep it away from children and pets, and wear gloves when pruning.
Bloom & Flower Guide
Quick Details
- Bloom Season: Spring, summer and autumn – a long, warm-season display
- Flower Appearance: Clusters of red-to-pink tubular flowers, each opening to five lobes, with sticky glandular hairs at the base
- Edibility: Not edible – ornamental only; the sap is a skin irritant
Detailed Blooming Overview
Indian leadwort is grown for its vivid red-to-pink flower spikes, which it produces over a long warm season. Each slender flower flares into five lobes, and the calyx behind them is coated in sticky glandular hairs – the “sticky edge” that later helps the seeds hitch a ride on passing animals and clothing.
Flower Characteristics
- Tubular flowers with five spreading lobes, red to pink.
- Sticky glandular hairs on the flower base that aid seed dispersal.
Bloom Care & Thinning
- Safety: The plant contains plumbagin and its sap can irritate skin – wear gloves when pruning.
- Keeping it flowering: Trim lightly between flushes and deadhead to encourage more bloom.
Pruning, Training & Seasonal Maintenance
Plumbago indica (Indian leadwort) is a mid-sized evergreen shrub reaching about 1-3m, sprawling and scandent like the rest of the genus but on a more modest scale than the largest species. It flowers on the current season’s new growth through spring, summer and autumn, so a winter cutback before spring growth resumes is the safest and most effective way to control its size and force the fresh wood that will carry the next bloom.
Quick Pruning & Maintenance Specs
| Pruning Tolerance |
High |
| Primary Pruning Window |
Winter (dormant, before spring growth) |
| Secondary Maintenance Window |
Spring–Autumn light deadheading and shaping |
| Typical Frequency |
One moderate winter cutback annually |
| Main Objective |
Control spread and refresh flowering wood |
| Young Plant Priority |
Establish a low-branching framework; light support if trained upward |
| Mature Plant Priority |
Annual winter renewal; contain sprawling stems |
| Best Tool Type |
Bypass secateurs, with loppers for older canes |
| Avoid Heavy Pruning During |
Active bloom flushes |
Pruning by Plant Age & Size
Newly Established
Remove only damaged growth; let the young shrub build size before structural cutting begins.
Young / Formative
Pinch or lightly head back young shoots to build a dense, low-branching framework; a light support such as a low trellis can be used if some height/spread training is wanted, though it is not required at this species’ more modest size.
Mature / Established
Cut the plant back by roughly a third each winter to keep it dense and floriferous; remove old, bare canes at the base and rein in stems that have sprawled and started to root.
Seasonal Pruning Schedule
Dormant/Winter
Objective: renew flowering wood and control size. Remove: spent flowering shoots, crossing growth, and low stems that have rooted at ground contact. Expected response: a strong flush of new growth in spring carrying that season’s scarlet flowers.
Ongoing Sanitary (Spring–Autumn)
Objective: keep the display tidy through its long bloom season. Remove: faded flower clusters and any shoot tips heavily infested with mealybug, whitefly or aphids. Flowering impact: none.
Flowering & Fruiting Wood
Flowers form on the current season’s new growth, not on older wood, so the winter cutback removes none of the coming season’s flowers and instead increases the amount of new flowering wood produced.
Structural Pruning & Training
- Branch selection: keep well-placed canes, remove thin or crossing growth
- Height & spread control: an annual cut keeps this moderately vigorous shrub within its space
- Renewal pruning: remove some of the oldest, most bare-based canes each winter
Special Growth to Remove
- Faded flower clusters
- Low stems that have rooted where they touch soil
- Old, bare canes at the base once younger replacement shoots exist
Container & Small-Space Pruning
Its intermediate size makes it manageable in a large container with an annual winter cutback and periodic pinching through the season to maintain a compact shape.
Tools
- Bypass secateurs – routine shaping and deadheading
- Loppers – older, thicker canes during the winter renewal cut
- Soft ties/stakes – if lightly trained upward
Tool Hygiene & Disease Risk
Routine: clean, sharp tools are sufficient; increase care only when removing shoot tips infested with mealybug, whitefly or aphids.
Cut Placement & Technique
Use heading cuts on young growth to build density; cut just above an outward-facing bud, and remove old canes flush at the base rather than leaving stubs.
Heavy Pruning & Rejuvenation
Tolerates a fairly hard cutback in late winter and reshoots readily; spread the most severe reduction over two winters on a very neglected plant.
Post-Pruning Care
Water in after a winter cut; skip extra feeding, since regrowth is typically vigorous on its own. Watch fresh growth for mealybug, whitefly and aphid buildup.
Common Pruning Mistakes
- Pruning hard mid-season and cutting into an active bloom flush
- Leaving sprawling stems unchecked to root and spread beyond the bed
- Skipping the winter renewal cut, leading to a woodier, less floriferous base
When NOT to Prune
Avoid a hard structural cut during active bloom, and avoid pruning shortly before an expected frost given its zone 8+ tenderness.
Recommended Tools (by task)
- bypass_secateurs – deadheading and routine shaping
- loppers – older canes at the base during the winter renewal cut
Pruning Troubleshooting
| Problem |
Possible Cause |
What to Check |
Corrective Action |
| Sparse flowering |
Cutback done too late, removing developing new growth |
Timing of the last hard prune versus spring growth start |
Move the cutback earlier, to late winter before shoots emerge |
| Leggy, bare-based growth |
No winter renewal cut for a season or more |
Amount of bare wood low on the plant |
Cut back harder this winter to force new low branching |
| Sticky or distorted shoot tips |
Mealybug, aphid or whitefly infestation |
Undersides of young leaves and soft tips |
Remove and dispose of heavily infested tips, then treat remaining growth |
Pests, Diseases & Troubleshooting
Overview: Plumbago indica is a tough, largely trouble-free Plumbaginaceae shrub whose main pests are the usual sap-suckers of soft new growth — mealybugs, whitefly and aphids — with spider mites in hot dry spells. The scarlet Asian species prefers more warmth and humidity than the blue Cape type. Diseases are minor and mostly cosmetic; most problems trace back to overwatering or low light. Favor airflow, sun and lean care, treating organically first.
Quick Troubleshooting Overview
| Issue / Pest |
Main Symptom |
Primary Solution |
| Mealybugs |
White cottony masses at nodes and leaf axils |
Alcohol swab, hose off, horticultural oil |
| Whitefly |
Tiny white flies rising in clouds; sticky leaves |
Yellow sticky traps, insecticidal soap, predators |
| Aphids |
Curled shoot tips, honeydew, ants |
Blast off, encourage ladybirds, soap spray |
| Spider mites |
Fine stippling and webbing in hot dry air |
Rinse, raise humidity, insecticidal soap |
| Powdery mildew |
White powdery film on leaves in humid shade |
Airflow, sun, sulfur/potassium-bicarbonate |
Common Pests & Management
- Mealybugs (Planococcus and Pseudococcus spp.):
- Symptoms: White cottony tufts clustered at stem nodes, leaf axils and undersides, with honeydew and sooty mold; growth of the affected shoots slows.
- Prevention & Control: Dab colonies with an isopropyl-alcohol swab, hose off with a firm jet, and encourage lacewings and mealybug destroyers; spray horticultural oil or insecticidal soap for persistent infestations and control attendant ants.
- Whitefly (Trialeurodes vaporariorum, Bemisia tabaci):
- Symptoms: Clouds of tiny white flies lift from the foliage when disturbed; leaves turn sticky with honeydew, then blacken with sooty mold and may yellow.
- Prevention & Control: Hang yellow sticky traps, encourage Encarsia parasitoids and hoverflies, and spray insecticidal soap or horticultural oil to leaf undersides in the evening, repeating to catch new hatches.
- Aphids (Aphis and Myzus spp.):
- Symptoms: Green or black colonies on tender shoot tips and flower buds cause curling and stickiness, drawing ants and sooty mold.
- Prevention & Control: Blast off with water, pinch heavily infested tips, and protect ladybirds and lacewings; insecticidal soap handles stubborn outbreaks.
- Spider mites (Tetranychus urticae):
- Symptoms: Fine pale stippling and delicate webbing on leaf undersides, worst on drought-stressed plants in hot, dry, dusty positions.
- Prevention & Control: Rinse foliage, keep the plant watered and unstressed, raise humidity, and apply insecticidal soap or a light oil; encourage predatory mites.
- Caterpillars (blue butterfly larvae) (Leptotes and Cacyreus spp.):
- Symptoms: Small green caterpillars nibble flower buds, blooms and soft new leaves — plumbago is a larval host plant for zebra/blue butterflies, so light feeding is normal and beneficial.
- Prevention & Control: Tolerate minor feeding to support butterflies; hand-pick or spot-treat with Bacillus thuringiensis only if damage is heavy, sparing the wider planting.
Diseases & Fungal Issues
- Powdery mildew (Erysiphales (e.g. Golovinomyces spp.)):
- Symptoms: White powdery coating on leaves and stems in humid, crowded, shady conditions, sometimes with distortion and early leaf drop.
- Treatment & Management: Increase sun and airflow, thin congested growth, avoid overhead watering, and apply sulfur, potassium bicarbonate or a horticultural oil at first signs.
- Leaf spot (Cercospora / Alternaria spp.):
- Symptoms: Brown or grey spots with darker margins on older leaves in wet, still weather; mostly cosmetic.
- Treatment & Management: Remove and bin affected leaves, water at the base, improve airflow, and use a copper fungicide only if spread is significant.
- Root & stem rot (Phytophthora / Rhizoctonia spp.):
- Symptoms: Wilting, blackening stem bases and collapse in heavy, waterlogged soil despite adequate watering.
- Treatment & Management: Plant in free-draining soil, never let roots sit wet, and remove affected plants; a biofungicide drench can protect neighbors.
Growing Difficulties & Abiotic Problems
- Poor flowering:
- Cause & Symptoms: Too much shade, over-feeding with nitrogen, or hard pruning at the wrong time gives lush growth but few of the signature blue (or red/white) flowers.
- Correction Strategy: Site in full sun, feed lightly and favor potassium, and prune after the main flush since bloom forms on new wood.
- Chlorosis:
- Cause & Symptoms: Yellowing between veins on alkaline or waterlogged soil where iron uptake is limited.
- Correction Strategy: Improve drainage, mulch, and correct with chelated iron and an acidifying feed if soil is very alkaline.
- Cold / frost damage:
- Cause & Symptoms: Blackened, wilted shoot tips after frost; the plant is tender in cold climates.
- Correction Strategy: Grow in a sheltered warm spot or containers that can be protected; cut back frost-killed wood in spring as it regrows readily from the base.
- Sap irritation (handling):
- Cause & Symptoms: The sap and spent flowers can irritate skin and eyes on sensitive people during pruning.
- Correction Strategy: Wear gloves and wash after handling; this is a grower-safety note rather than a plant health problem.
What Helps — Products & Tools
Sun, airflow and lean watering prevent most issues. Useful products are insecticidal soap and horticultural/neem oil for mealybugs, whitefly, aphids and mites, yellow sticky traps for whitefly, Bacillus thuringiensis (Bt) for heavy caterpillar damage, and sulfur or potassium bicarbonate for powdery mildew.
Propagation Guide
Indian leadwort roots readily from stem cuttings, and because it spreads and suckers from the root system, rooted suckers can also be lifted and separated as an alternative to cuttings. No grafting is needed and propagation is easy.
Quick Propagation Specs
| Best Propagation Method |
Semi-hardwood stem cuttings |
| Alternative Methods |
Division of rooted suckers; seed |
| Propagation Difficulty |
Easy |
| Vegetative True-to-Type |
Yes |
| Best Propagation Season |
Spring through autumn |
| Cutting Rooting Time |
Typically a few weeks under warm, humid conditions |
Stem Cuttings
Cutting Type
Semi-hardwood cuttings from firm side shoots.
Best Timing
Spring through summer.
Cutting Preparation
Take a several-node cutting, strip lower leaves, cut below a node.
Rooting Setup
Insert into free-draining, moist mix and keep humid.
Rooting Hormone
Optional.
Rooting Time
Usually a few weeks under warm, humid conditions.
Division, Offsets, Pups & Suckers
This species spreads by root suckers, consistent with its noted invasive tendency. Rooted suckers with their own root system can be dug and separated from the parent clump, ideally during the growing season, and grown on independently; suckers without their own roots should not be separated.