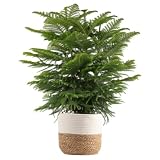
Care Guide: Planting, Soil & Watering
Overview: Norfolk Island pine is a large subtropical conifer that grows in well-draining, sandy-loam soil in sun to part shade. It needs warmth (above 0°C), plenty of room and even, moderate to high moisture.
Quick Care Requirements
| Requirement |
Ideal Condition |
| Planting Season |
Spring through autumn (winter in zones 10b–11) |
| Growth Rate |
Slow to Moderate |
| Soil Type |
Well-draining, sandy-loam |
| Water Need |
Moderate to High (keep evenly moist) |
Planting & Establishment
- Best Planting Season: Plant in spring, summer or autumn (winter is also possible in zones 10b–11).
- How to Plant:
- Hole Preparation: Dig a hole about 50% wider than the root ball, allowing plenty of surrounding space for a large tree.
- Soil Amendments: Mix in some organic matter along with sand or grit to keep drainage free.
- Planting Depth: Set the root collar at soil level and firm gently.
- Growth Speed & Expectations: Slow to moderate, but ultimately a very tall tree, so plan for its eventual size.
Soil, Watering & Drainage Care
- Soil Mix & Drainage Needs: Well-draining sandy-loam keeps the roots healthy; avoid heavy, waterlogged ground.
- Watering Schedule & Technique:
- Young / Newly Planted: Keep the soil evenly moist while the tree establishes.
- Established: Water deeply and regularly, keeping the root zone moist without letting it dry out fully.
- Seasonal Adjustments: Less water in cool winter weather, more in warm, dry spells.
Growing in Pots, Balconies & Indoors
The grower does not treat Norfolk Island pine (Araucaria heterophylla) as a houseplant, and it is not suited to long-term pots – it is famously kept indoors while young, yet a huge tree at maturity. A young plant will sit happily in a large tub on a patio for a few years, but it eventually needs the open ground.
Quick Details
- Container Size: Large tub while young only – not a long-term pot plant
- Indoor Suitability: Popular indoor plant while young, but ultimately far too large
- Best Spot: Full sun to half shade, outdoors
- Soil & Drainage: Well-aerated, free-draining mix
- Watering in Pots: Average to generous – do not let it dry out fully
Indoors & On the Windowsill
- Houseplant reality: Young Norfolk Island pines are among the best-known indoor conifers and take a bright room well while small; the grower still marks it as not a true houseplant because in time it becomes a very large tree that outgrows any room or pot.
- Best indoor spot: The brightest position you have, with steady moisture and a little humidity; turn it now and then so it grows evenly.
On a Balcony or Patio
- Light & wind: Give it the sunniest, airiest spot. Pots on a balcony or patio dry fast – walls, railings and paving reflect heat – so check moisture often and water more in warm, windy spells. Remember a full pot is heavy and sheds run-off when watered.
- While young only: A large tub works for the first few years; move it into the ground before it becomes root-bound and top-heavy.
Choosing the Pot, Soil & Long-Term Care
- Pot & drainage: A large, stable, deep container. Use a pot with strong drainage holes and skip a standing-water saucer so the roots never sit wet – that is the fastest route to root rot. Terracotta breathes and dries faster, while glazed or plastic pots hold moisture longer.
- Potting mix: Fill with a well-aerated, organic mix – a quality potting mix, or peat/coir loosened with perlite or vermiculite.
- Watering in pots: Average to generous – do not let it dry out fully; pots dry faster than open ground.
- Feeding: Potted plants need feeding a little more often than those in the ground, as regular watering steadily leaches nutrients away – feed lightly through the growing season.
- Repotting: Refresh the mix and pot up about every couple of years, lightly trimming roots and top growth to keep it in balance.
Bloom & Flower Guide
Quick Details
- Bloom Season: Spring
- Time to First Bloom: Only on large, old trees — indoor and young specimens rarely, if ever, cone
- Flower Appearance: Small yellow male (pollen) cones and separate female cones (which can occur on the same tree), ripening yellow to brown
- Edibility: Ornamental / none at the bloom stage — popular as a shade tree and houseplant
Detailed Blooming Overview
Norfolk Island pine is a conifer, so it produces cones rather than true flowers, and it only does so as a large, mature tree — the young plants grown indoors as living Christmas trees will not cone. On old specimens, small yellow pollen cones and separate rounded female cones form, the female cones ripening from yellow to brown.
Flower Characteristics
- Male pollen cones are small and yellow.
- Female cones are rounded and ripen from yellow to brown.
- Male and female cones are usually separate but can occur on the same tree.
Bloom Care & Thinning
- Nothing to deadhead: The cones need no thinning.
- Pollination: Wind carries the pollen; no insects are involved.
- Reality check: Don’t expect cones from a potted or young tree — coning is strictly a feature of tall, mature specimens.
Pruning, Training & Seasonal Maintenance
Norfolk island pine grows with a single dominant leader and tiers of whorled branches (an excurrent conifer habit), so it tolerates only light, mostly corrective pruning and does not respond well to hard cutting back. Pruning has essentially no effect on flowering or cone production (the cones are inconspicuous and slow to form regardless of pruning); its real purpose is protecting the tree’s single growing point and symmetrical tiered form while the tree is young, since a lost or damaged leader cannot be cleanly replaced later. Corrective work is safest while the tree is small and reachable; on mature trees pruning is limited to hazard and deadwood removal, often beyond safe DIY reach given an eventual height of 20–60m.
Quick Pruning & Maintenance Specs
| Pruning Tolerance |
Low |
| Primary Pruning Window |
First few years, while young and reachable |
| Secondary Maintenance Window |
Any time, for dead/damaged branch removal only |
| Typical Frequency |
Occasional, corrective only — not a routine annual task |
| Main Objective |
Protect the single leader and tiered, symmetrical form |
| Young Plant Priority |
Remove competing/co-dominant leaders early |
| Mature Plant Priority |
Remove only dead, broken, or hazardous branches |
| Best Tool Type |
Pruning saw or pole pruner; tall mature trees usually need a certified arborist |
| Avoid Heavy Pruning During |
Active new spring flush, when growth is soft and easily torn |
Pruning by Plant Age & Size
Newly Established
Leave alone except for any growth damaged in transplanting; the tree needs its full branch structure to build energy while young.
Young / Formative
Central-leader training: watch for and remove any competing vertical shoot that could rival the main leader, since Norfolk island pine cannot reliably regrow a true replacement leader if the original is lost — losing it permanently disfigures the tree’s form. Do not remove whole lower whorls for a “cleaner trunk” look; young trees need that foliage mass for vigor.
Mature / Established
Structural training is essentially finished; the only ongoing task is removing dead, broken, or hazardous branches, usually at height on a tree this large.
Seasonal Pruning Schedule
Ongoing Sanitary
Objective: safety and tidiness. Remove dead, broken, or storm-damaged branches as needed year-round (the species is evergreen with no dormant season in its 9b–11 range). What NOT to remove: the leader/growing tip, or healthy lower whorls on a young tree. Expected response: clean healing at the branch collar; no effect on the tree’s slow, decades-long cone production either way.
Structural Pruning & Training
- Leader selection: keep exactly one dominant vertical stem; remove any fork or co-dominant leader while stems are still small.
- Never top the tree for height control — topping removes the sole growing point, and lateral branches will not form a clean replacement leader, leaving a permanently flat-topped or multi-headed tree.
Special Growth to Remove
Fully dead or storm-damaged branches, removed at the branch collar. Natural shedding of shaded lower branches on older trees is normal and does not need intervention unless a branch is fully dead and a hazard.
Tools
- Precision snips or bypass secateurs — removing a competing leader shoot or small side growth on a young tree.
- Pruning saw / pole pruner — removing dead or damaged branches on a taller specimen without climbing; on large mature trees this work is often best left to a certified arborist.
Tool Hygiene & Disease Risk
Routine: clean, sharp tools are sufficient. No transmissible pathogen is documented for this species that would require disinfecting between cuts.
Cut Placement & Technique
Use thinning cuts (removing a branch back to its point of origin) rather than heading cuts; cut just outside the branch collar and avoid flush cuts or long stubs. Above all, never cut or damage the terminal leader bud.
Heavy Pruning & Rejuvenation
Not tolerated. Removing or damaging the leader results in permanent disfigurement (a flat top or multiple competing heads) because the tree cannot regenerate a true single replacement leader from its lateral branches. There is no rejuvenation-pruning practice for this species — protect the leader instead of relying on recovery cuts.
Post-Pruning Care
After any corrective cut, simply monitor the wound for pests; no feeding is needed for light corrective pruning. On young trees, watch that a new single leader re-establishes cleanly after removing a competitor.
Common Pruning Mistakes
- Heading back or damaging the leader, causing permanent multi-headed or flat-topped regrowth.
- Topping a large specimen to control height.
- Stripping whole lower whorls from a young tree before it has the size/vigor to spare them.
When NOT to Prune
Never remove or damage the leader at any age. Avoid pruning during the soft, brittle spring growth flush. On tall mature trees, avoid any elevated work without professional equipment and training — this is a hazard issue as much as a horticultural one.
Recommended Tools (by task)
- Young tree, competing-leader/small shoot removal — precision_snips: clean small cuts that won’t crush or tear the tender leader tissue.
- Mature tree, dead/damaged branches out of reach — pole_pruner: removes hazardous deadwood from the ground without climbing a tree that can reach 20–60m.
- Mature tree, larger dead branches within reach — pruning_saw: clean collar cuts on thicker dead wood that snips or loppers can’t handle.
Pruning Troubleshooting
| Problem |
Possible Cause |
What to Check |
Corrective Action |
| Multiple competing vertical tips / split crown |
Original leader was lost or damaged and several laterals turned upward to compete |
Look for two or more upright leaders instead of one |
On a young tree, select the strongest and remove the rest; on a mature tree with an established multi-head form, accept it — there is no clean fix |
| Dieback in the lower or interior branches |
Often simple natural self-shading/self-pruning of older lower whorls |
Confirm the dieback is limited to the lowest, most shaded tier rather than scattered randomly through the canopy |
Remove fully dead branches at the collar for tidiness/hazard only; scattered random dieback warrants a pest/disease check instead |
Pests, Diseases & Troubleshooting
Overview: The Norfolk Island pine is a subtropical conifer usually grown indoors, where its main pests are scale (the most common), mealybugs and, in dry heated air, spider mites. Disease is limited mainly to root rot from overwatering. Most of its troubles, though, are abiotic: lower-branch browning and needle drop from low humidity, dry heat, drafts or watering errors — and crucially it does NOT regrow lost lower branches, so protecting the canopy is essential. Bright light, even moisture and moderate humidity keep it healthy.
Quick Troubleshooting Overview
| Issue / Pest |
Main Symptom |
Primary Solution |
| Scale insects |
Brown bumps on needles/stems, honeydew |
Wipe off, prune, horticultural oil, keep vigorous |
| Mealybugs |
White cottony tufts in axils |
Alcohol swab, isolate, oil/soap |
| Spider mites |
Stippled, bronzed, dropping needles |
Raise humidity, rinse foliage, oil |
| Root rot |
Lower branches brown, mushy roots |
Free-draining mix, water then let top dry |
| Needle drop |
Lower branches brown and fall (do not regrow) |
Bright light, even moisture, humidity, no drafts |
Common Pests & Management
- Scale insects (Coccidae / Diaspididae):
- Symptoms: Brown, oval limpet-like bumps clamped along the needles, branchlets and stems — the most common Norfolk Island pine pest indoors — often with sticky honeydew and black sooty mould, and yellowing, dropping foliage.
- Prevention & Control: Wipe or scrape off accessible scale, prune out heavily encrusted branchlets, and smother with horticultural oil, repeating to catch the mobile crawler stage; isolate infested plants and keep the tree vigorous and unstressed.
- Mealybugs (Pseudococcus / Planococcus spp.):
- Symptoms: White cottony tufts in the branch axils and along the stems, with honeydew and sooty mould; growth stunts and foliage yellows.
- Prevention & Control: Dab off with an alcohol-dipped cotton bud, isolate the plant, encourage lacewings where feasible, and treat repeatedly with horticultural oil or insecticidal soap.
- Spider mites (Tetranychus / Oligonychus spp.):
- Symptoms: Fine stippling, dullness and bronzing of the needles with faint webbing, thriving in the warm, dry air of heated rooms; foliage fades and drops.
- Prevention & Control: Raise humidity, rinse or hose the foliage, and introduce predatory mites; horticultural oil or insecticidal soap controls outbreaks.
- Aphids (Aphidoidea):
- Symptoms: Soft insects on soft new growth with honeydew and sooty mould; occasional and usually minor.
- Prevention & Control: Rinse off, encourage beneficials, and use insecticidal soap only if persistent.
Diseases & Fungal Issues
- Root rot (Phytophthora / Pythium spp.):
- Symptoms: Browning and dropping of the lower branches, yellowing and general decline, with dark, mushy roots from overwatering or a poorly drained, waterlogged pot.
- Treatment & Management: Grow in a free-draining mix, water thoroughly then let the top few centimetres dry, and never leave the pot standing in water; correct drainage promptly, as advanced root rot is usually fatal.
- Anthracnose / needle blight (Colletotrichum / various fungi):
- Symptoms: Browning and dieback of needle tips and branchlets in warm, wet, stagnant conditions, sometimes with dark lesions; secondary to stress and poor airflow.
- Treatment & Management: Improve airflow, avoid wetting the foliage, remove affected branchlets, and keep the plant healthy; treatment is rarely needed if culture is corrected.
Growing Difficulties & Abiotic Problems
- Lower-branch browning & needle drop:
- Cause & Symptoms: Low humidity, dry heat, drafts, over- or under-watering, or too little light cause the lower branches to brown and drop — and, unlike many plants, Norfolk pines do NOT regrow lost lower branches.
- Correction Strategy: Keep it in bright light with moderate humidity, away from heat sources and drafts, and water evenly (moist, not soggy); protect the lower canopy, since it cannot be recovered once lost.
- Drooping, weak branches / leaning:
- Cause & Symptoms: Insufficient light makes branches thin, droopy and sparse, and the whole plant leans toward the light and grows lopsided.
- Correction Strategy: Give bright light (ideally some direct sun indoors), and rotate the plant regularly for even, upright, symmetrical growth.
- Salt build-up / brown tips:
- Cause & Symptoms: Fertiliser-salt accumulation and hard water brown the needle tips.
- Correction Strategy: Flush the mix periodically with clean water, feed lightly during active growth, and use soft or rain water where the supply is hard.
- Cold damage:
- Cause & Symptoms: As a subtropical (Norfolk Island) conifer it is frost-tender and chills below about 5 °C.
- Correction Strategy: Keep it above its cold threshold, away from cold windows and drafts, and never leave it outdoors in frost.
What Helps — Products & Tools
Cultural care is central: bright light, moderate humidity, even watering and a free-draining mix. Where pests appear, suitable types are horticultural oil or insecticidal soap for scale, mealybugs, mites and aphids, applied thoroughly and repeated for crawlers; correcting drainage — not a fungicide — is the answer to root rot. Flush salts with clean water and feed lightly.