Care Guide: Planting, Soil & Watering
Overview: Heliconia rostrata is a large, tropical rhizomatous perennial that thrives in warmth and high humidity, in full sun to part shade. It needs rich, moisture-retentive soil and generous, steady watering.
Quick Care Requirements
| Requirement |
Ideal Condition |
| Planting Season |
In spring through autumn in warm, frost-free conditions |
| Growth Rate |
Fast |
| Soil Type |
Rich, well-draining |
| Water Need |
Moderate to High |
Planting & Establishment
- Best Planting Season: Plant from spring to autumn in a warm, frost-free, sheltered spot (hardiness zone 12b and warmer).
- How to Plant:
- Hole Preparation: Set the rhizomes in a generous hole in loosened, enriched soil, wide enough for the clump to spread.
- Soil Amendments: Work in plenty of compost and organic matter for a rich, moisture-retentive soil that still drains freely.
- Planting Depth: Plant the rhizome shallowly with the growing points near the surface; do not bury it deeply.
- Growth Speed & Expectations: A fast grower reaching 1.5-5 m (5-15 ft).
Soil, Watering & Drainage Care
- Soil Mix & Drainage Needs: Provide rich, well-drained soil; high humidity suits it, but avoid stagnant waterlogging.
- Watering Schedule & Technique:
- Young / Newly Planted: Keep consistently moist after planting to establish the rhizomes.
- Established: Water generously and regularly to keep the soil moist in the warm growing season.
- Seasonal Adjustments: Water freely in heat; ease back a little in cooler, duller weather while keeping it from drying out.
Growing in Pots, Balconies & Indoors
Hanging Lobster-claw (Heliconia rostrata) is not a houseplant, per the grower, and it is a large tropical reaching up to 5 m, so containers suit it only while young or as a big patio specimen. A pot does let you move it under cover, which it needs where winters are not tropical.
Quick Details
- Container Size: Large – a big tub for a young plant or short-term display
- Indoor Suitability: Not a houseplant; too large and too demanding of warmth and humidity
- Best Spot: Full sun to part shade, warm and sheltered
- Soil & Drainage: Rich, well-drained soil kept consistently moist
- Watering in Pots: Average to plenty – it drinks heavily in warm weather
Indoors & On the Windowsill
- Why not indoors: The grower does not rate it as a houseplant – it grows tall and needs tropical warmth, humidity and strong light to produce its famous hanging bracts.
- Under glass: A large warm conservatory or greenhouse is the only realistic indoor home; otherwise grow it outside in warmth and shelter it from cold.
On a Balcony or Patio
- Light & wind: Bright light with some shelter from harsh midday sun suits it. Pots dry fast in heat and wind, so check moisture daily in warm weather and never let this moisture-lover dry out; shelter tall stems from wind.
- Practicalities: A large, wet pot is heavy – position it before filling, and allow for drainage runoff on paving or decking.
Choosing the Pot, Soil & Long-Term Care
- Pot & drainage: Use a large pot with strong drainage holes; skip a standing-water saucer to avoid root rot. Terracotta breathes and dries faster, while glazed or plastic pots hold moisture and steady a tall plant.
- Potting mix: A rich, well-aerated organic mix – peat or coir with plenty of compost or organic matter, lightened with perlite or vermiculite for drainage.
- Feeding: Feed generously through the warm season – a big heliconia in a pot leaches nutrients fast.
- Repotting: Refresh the mix or pot up about every two years; for clumping perennials, lift and divide, trimming the roots and old top growth as you go.
Bloom & Flower Guide
Quick Details
- Bloom Season: Mainly summer, in warm tropical conditions
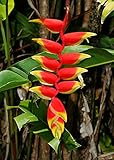
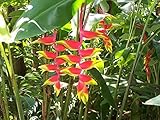
- Flower Appearance: Small yellow-green true flowers tucked inside dramatic hanging red bracts edged with yellow and green
- Edibility: Ornamental only — grown for its showy bracts, not eaten
Detailed Blooming Overview
Heliconia rostrata is famous for its pendent, ‘lobster-claw’ flower spikes. The true flowers are small and yellow-green; the show comes from the boat-shaped bracts arranged in two ranks along a drooping spike, each shaped like a triangle to a teardrop. The bracts hold rainwater and their nectar is a strong draw for hummingbirds. It blooms in the warmth of summer.
Flower Characteristics
- Small yellow-green flowers, individually inconspicuous.
- Bracts are red with yellow and green edges, boat-shaped, on a hanging spike.
- Bracts hold water and attract hummingbirds.
Bloom Care & Thinning
- Managing the bloom: Cut spent flower spikes back at the base and remove dead leaves so the bracts stand out.
- Conditions for best flowering: Rich, well-drained soil, steady warmth and ample water support strong flowering.
Pruning, Training & Seasonal Maintenance
Heliconia rostrata is a rhizomatous, clump-forming tropical perennial: each above-ground stem (a leafy pseudostem, or “cane”) emerges from the rhizome, matures, produces one terminal inflorescence, and then goes into decline – it does not re-flower. Because there is no persistent woody framework to shape, pruning here means ongoing maintenance rather than structural training: canes and dead leaf material can be removed at almost any time of year, and the main objective is to remove spent or damaged growth so the rhizome channels energy into new flowering canes rather than to control the plant’s overall form.
Quick Pruning & Maintenance Specs
| Pruning Tolerance |
High for maintenance cuts; no structural/shaping pruning applies |
| Primary Pruning Window |
Year-round, driven by which canes have finished flowering |
| Typical Frequency |
Ongoing – light removal every few weeks in active growth |
| Main Objective |
Redirect the rhizome’s energy from spent canes into new flowering canes |
| Mature Plant Priority |
Thin congested clumps every 1–2 years |
| Best Tool Type |
Precision snips for leaves; loppers or a pruning saw for fibrous cane bases |
| Avoid Heavy Pruning During |
Cool or unusually dry spells outside the tropical growing season |
Pruning by Plant Age & Size
Newly Established
Remove only visibly dead nursery-stage leaves; let the young clump build up several canes before any maintenance cutting begins.
Young / Formative
No structural training applies – the plant has no branch framework to form. Priority is simply letting the clump bulk up.
Mature / Established
Once flowering starts, rotate out spent canes as they finish blooming and thin the clump periodically to keep new canes vigorous and to maintain airflow through the dense foliage.
Seasonal Pruning Schedule
Post-Flowering (per cane)
Objective: remove the spent cane before it decays in place. Remove: the flowered cane, cut near ground level, once its bracts have faded and dried. Do not remove: neighboring canes that have not yet flowered. Expected response: the rhizome pushes new canes into the cleared space. Flowering impact: none – that cane was finished; removal has no effect on canes still to come.
Ongoing Sanitary
Objective: keep the clump tidy and reduce disease harborage. Remove: browned/yellowed leaf blades and wind- or cold-damaged canes, any time. Do not remove: healthy green canes that have not bloomed yet.
Structural Pruning & Training
The relevant “structure” is the clump itself rather than any single stem. Renewal thinning – removing roughly a quarter to a third of the oldest or spent canes every year or two – keeps the clump from becoming a congested mat of old fibrous canes, improves air movement through the foliage (reducing fungal leaf-spot risk in humid conditions), and keeps new canes vigorous enough to flower well.
Special Growth to Remove
- Spent flowering canes – cut near the base once the terminal bracts fade; this is also how the plant’s bloom-then-decline cycle is managed, since there is no persistent flowering wood to preserve.
- Dead or badly tattered leaves – remove where they meet the cane rather than tearing.
- New basal shoots from the rhizome are the plant’s normal means of renewal and should be retained unless the goal is to control clump spread.
Container & Small-Space Pruning
Heliconia rostrata is grown in outdoor containers (it is not suited as an indoor houseplant). Cutting live canes will not meaningfully dwarf a rhizomatous plant like this – only dividing and repotting the rhizome mass controls its size in a container. In pots, prioritize prompt removal of spent canes (they take up disproportionate space in a limited root zone) and plan on lifting and dividing the rhizome every couple of years before it girdles itself against the container wall.
Tools
- precision_snips or bypass_secateurs – dead leaf removal and thin canes
- loppers – medium cane bases
- pruning_saw – thick, fibrous cane bases in a mature clump
Tool Hygiene & Disease Risk
Routine: clean, sharp tools are sufficient. In humid conditions, fungal leaf-spot can develop on old foliage, so prompt removal (and not leaving cut leaf debris piled in the clump) matters more than sterilizing between individual cuts.
Cut Placement & Technique
Cut spent canes as close to the base/rhizome as practical with a clean, angled cut. Remove dead leaf blades at the point they join the cane rather than pulling or tearing them away, which can strip live tissue with them.
Heavy Pruning & Rejuvenation
An overgrown, congested clump tolerates a hard renewal cut – removing most canes near the base to force a fresh flush of new growth. This sacrifices bloom for one to two flowering cycles while the rhizome regenerates, so it is best done to only a portion of a large planting at a time rather than the whole clump at once.
Post-Pruning Care
Keep the root zone consistently moist after any heavy thinning, since a newly opened clump loses the shade and mulching effect of its own foliage. No extra feeding is needed beyond the plant’s normal schedule; watch new shoots for slug/snail damage while they are soft.
Common Pruning Mistakes
- Cutting a cane before it has flowered, which forfeits that cane’s bloom entirely.
- Shearing the foliage for a tidy outline, which shreds the large leaf blades instead of making clean cuts.
- Leaving spent, decaying canes in the clump instead of removing them at the base.
When NOT to Prune
Avoid stripping all foliage/canes from a clump at once – the plant needs standing leaf area to keep feeding the rhizome. Hold off on hard renewal thinning during cool or unusually dry spells, when regrowth is slower and the clump is under more stress.
Recommended Tools (by task)
- Dead leaf removal, any age – precision_snips: clean cuts on soft leaf tissue without crushing it.
- Spent flowering cane, medium clump – loppers: cane bases are too thick and fibrous for hand snips.
- Renewal thinning, mature congested clump – pruning_saw: old cane bases at ground level can be tough and woody-fibrous.
Pests, Diseases & Troubleshooting
Overview: Heliconias are lush tropical relatives of bananas and gingers, grown for their dramatic bracts, and in warm, moist, well-drained ground they are generally vigorous. Their main pests are mites and sap-suckers in dry or sheltered conditions, plus root-knot nematodes and some banana-group pests; their serious diseases are root/rhizome rot and fungal leaf spot in waterlogged or crowded plantings. Clean stock, drainage and airflow are the foundation of control. H. rostrata is the hanging lobster-claw.
Quick Troubleshooting Overview
| Issue / Pest |
Main Symptom |
Primary Solution |
| Spider mites |
Stippling, bronzing, webbing in hot/dry air |
Raise humidity, wash foliage, horticultural oil/miticide |
| Mealybug & scale |
White fluff / brown bumps, honeydew |
Alcohol swab, insecticidal soap/oil |
| Root-knot nematode |
Galled roots, stunting, wilting |
Clean stock, rotate, soil health |
| Root / rhizome rot |
Soft foul rhizomes; yellowing, collapse |
Plant clean stock in drained soil; avoid waterlogging |
| Leaf spot |
Brown/tan spots and streaks on leaves |
Airflow, remove leaves, copper if needed |
| Caterpillars/grasshoppers |
Chewed, ragged leaf margins |
Hand-pick, Bt for caterpillars |
Common Pests & Management
- Spider mites (Tetranychus spp.):
- Symptoms: Fine stippling and a bronze cast on leaves with webbing on undersides and along midribs, worst in hot, dry, sheltered spots or under cover.
- Prevention & Control: Raise humidity and hose down the foliage (especially undersides) regularly; at first sign treat with horticultural oil, insecticidal soap or a miticide, repeating every 5–7 days. Predatory mites help under cover.
- Mealybug (Pseudococcus / Planococcus spp.):
- Symptoms: White cottony tufts in leaf sheaths, leaf axils and the crown, with honeydew and sooty mould; can also infest the rhizome zone.
- Prevention & Control: Dab with 70% alcohol and spray insecticidal soap or horticultural oil into the sheaths, repeating. Inspect rhizomes at planting and discard infested stock.
- Scale insects (Coccidae & Diaspididae):
- Symptoms: Brown or waxy immobile bumps on stems, leaf sheaths and midribs with honeydew.
- Prevention & Control: Wipe or scrape off, then horticultural oil to smother crawlers; prune out heavily encrusted growth.
- Aphids (Aphididae (incl. banana aphid, Pentalonia nigronervosa)):
- Symptoms: Soft insects on new growth and in the crown, causing distortion and honeydew; the banana aphid can transmit viruses in the banana/heliconia group.
- Prevention & Control: Blast off with water and encourage predators; insecticidal soap or a light oil for persistent colonies. Control matters partly to limit virus spread.
- Root-knot nematode (Meloidogyne spp.):
- Symptoms: Below-ground pest causing root galls, with above-ground stunting, yellowing and wilting in warm sandy soils.
- Prevention & Control: Plant clean, nematode-free rhizomes, rotate away from infested ground, build soil organic matter and beneficial microbes, and solarise beds before planting in warm climates.
Diseases & Fungal Issues
- Root & rhizome rot (Pythium / Fusarium / Rhizoctonia spp.):
- Symptoms: Soft, water-soaked, foul decay of roots and rhizomes with yellowing, wilting and clump collapse; the result of waterlogged soil or planting infected rhizomes.
- Treatment & Management: Plant firm, clean rhizomes in rich but free-draining soil, avoid waterlogging, and don’t overwater. Lift and cut away rot, discard badly affected pieces, and replant healthy divisions in fresh drained ground.
- Fungal leaf spot (Cercospora / Bipolaris / Colletotrichum spp.):
- Symptoms: Brown, tan or reddish spots, streaks and blotches on leaves, sometimes with yellow halos, enlarging in warm wet weather and crowded plantings.
- Treatment & Management: Improve airflow by dividing and spacing, avoid overhead watering, and remove affected leaves. Copper or a suitable fungicide protects new foliage during persistent wet spells.
- Bacterial wilt / Moko (host risk) (Ralstonia solanacearum):
- Symptoms: As banana relatives, some heliconias can host this bacterium — sudden wilting of green foliage and vascular browning, with ooze from cut tissue; plants do not recover. (Mainly a concern near infected banana/heliconia plantings.)
- Treatment & Management: There is no cure — remove and destroy affected plants and surrounding soil, plant certified clean stock, sanitise tools, and avoid moving soil or water from infected areas. Keep separate from infected banana crops.
Growing Difficulties & Abiotic Problems
- Cold / frost sensitivity:
- Cause & Symptoms: As tropicals, heliconias are damaged or killed by cold; foliage blackens and rhizomes rot in cold-wet soil.
- Correction Strategy: Grow in warm, frost-free conditions or under cover; mulch rhizomes and keep drier through cool spells. Damaged foliage should be cut back once warmth returns.
- Wind tatter & sun scorch:
- Cause & Symptoms: Strong wind shreds the large paddle leaves and fierce direct sun scorches them.
- Correction Strategy: Site in bright light with shelter from strong wind and harsh midday sun; keep roots moist to reduce scorch.
- Waterlogging:
- Cause & Symptoms: Constantly saturated soil rots roots and rhizomes despite the plant’s love of moisture.
- Correction Strategy: Grow in rich, moisture-retentive but free-draining soil; water generously but never leave it swampy.
- Nutrient deficiency / poor bract colour:
- Cause & Symptoms: Pale growth and weak, few bracts on hungry or root-bound plants.
- Correction Strategy: Feed generously through the growing season, keep the soil rich in organic matter, and divide congested clumps to restore vigour and flowering.
What Helps — Products & Tools
Lead with clean rhizomes, drainage and airflow. For pests: horticultural/neem oil and insecticidal soap for mites, mealybug, scale and aphids, with a miticide in reserve; manage nematodes culturally. For disease: copper fungicide for leaf spot, and strict sanitation for root/rhizome rot and bacterial wilt (no spray cure — rogue and destroy).
Propagation Guide
Heliconia rostrata (Balisier) is propagated mainly by dividing its rhizome, since the site notes vegetative reproduction is needed to reproduce the same yellow-and-green-edged red bract colouring – seedlings can differ. Division gives a faster-establishing, identical plant with moderate effort, while raising it from seed is slower and less certain.
Quick Propagation Specs
| Best Propagation Method |
Rhizome Division |
| Alternative Methods |
Seed |
| Propagation Difficulty |
Moderate |
| Seed True-to-Type |
Variable – site notes vegetative propagation is needed “to get the color that you want” |
| Vegetative True-to-Type |
Yes |
| Best Propagation Season |
Spring to summer (site planting season: spring, summer, autumn) |
| Seed Germination Time |
Slow and often irregular, commonly several weeks to a few months |
| Germination Temperature |
Warm, roughly 24–29°C (75–85°F) |
Growing from Seed
Seed Handling & Viability
Sow Heliconia seed while relatively fresh, since viability declines in storage.
Dormancy & Pre-Sowing Treatment
Soaking seed for a day or two before sowing can help soften its hard coat and improve germination.
Germination Conditions & Time
Warm, humid conditions are needed; germination is slow and can be staggered over several weeks to a few months.
Seedling Care
Keep seedlings warm and humid; they take time to reach a plantable size.
Rhizomes, Tubers, Bulbs & Corms
Rhizome Division
Divide clumps in the warm growing season, taking a rhizome section with its own shoot(s) and roots attached. Reducing some foliage on the division limits water loss while new roots establish; keep it warm, humid and evenly moist until it resumes active growth.