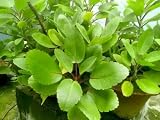
Care Guide: Planting, Soil & Watering
Overview: This Kalanchoe is a drought-tolerant succulent for warm, frost-free climates (desert, mediterranean and subtropical) that stores water in its fleshy leaves. It needs a gritty, free-draining soil and only occasional watering, thriving in full sun to light shade.
Quick Care Requirements
| Requirement |
Ideal Condition |
| Planting Season |
In spring to summer in cooler zones, extending to autumn in warmer zones, and year-round in the warmest (frost-free) zones |
| Growth Rate |
Slow |
| Soil Type |
Gritty, free-draining mix (cactus/succulent mix or sandy soil) |
| Water Need |
Low – water sparingly and let the soil dry out between waterings; avoid overwatering |
Planting & Establishment
- Best Planting Season: Plant in the warm season; in borderline zone 10a it may need winter protection or covering, so it is safer grown in zone 10b and warmer.
- How to Plant:
- Hole Preparation: Make a planting pocket about as deep as the root ball and a little wider, in fast-draining ground or a raised gritty bed.
- Soil Amendments: Open up the soil with coarse sand, grit or a cactus mix rather than heavy, moisture-holding material; keep the site sharply drained.
- Planting Depth: Set the plant so the base of the stem sits at soil level; do not bury the fleshy stem, which can rot if kept wet.
- Growth Speed & Expectations: Slow-growing; the copper-leaved orgyalis is a slow grower that speeds up a little with age, reaching about 20 to 40 cm.
Soil, Watering & Drainage Care
- Soil Mix & Drainage Needs: Sharp drainage is essential to prevent root and stem rot. In containers use a cactus or succulent mix, add a layer of grit at the base, and make sure the pot drains freely. Use a cactus mix or sandy soil, and in rainy spots set it on lava grit or in a raised bed so water never pools around it.
- Watering Schedule & Technique:
- Young / Newly Planted: Water lightly after planting and then only when the soil has dried, letting new roots reach for moisture.
- Established: Water sparingly once established, giving a thorough drink and then letting the soil dry out completely before the next.
- Seasonal Adjustments: Water a little more in the heat of summer growth, and keep it nearly dry through the cool, low-light winter months. Indoors, take care not to overwater and give it a bright spot.
Growing in Pots, Balconies & Indoors
Kalanchoe orgyalis (copper spoons) is a compact succulent that makes an easy, good-looking houseplant or patio-pot plant. It stays small, stores its own water and asks mainly for light and sharp drainage. Indoors it needs your brightest window – in a room’s weaker light it stretches and softens.
Quick Details
- Container Size: A pot a size or two larger than the root ball, with strong drainage holes
- Indoor Suitability: A good little houseplant in a bright spot
- Best Spot: Bright light to full sun
- Soil & Drainage: Free-draining cactus/gritty mix – drainage is everything
- Watering in Pots: Water only when the mix has dried out; pots must never stay soggy
Indoors & On the Windowsill
- As a houseplant: Yes – it grows happily indoors given enough light. Stand it at your brightest window (south or west facing) so growth stays tight and well coloured rather than pale and drawn.
- Windowsill growing: Its compact size suits a sunny sill; turn the pot now and then for even growth, and water only when the mix is dry.
- Overwintering: In cold climates a pot lets you bring it indoors to a bright, cool, frost-free spot over winter.
- Keep it safe: Kalanchoe is toxic if eaten – keep it out of reach of children and pets.
On a Balcony or Patio
- Light, heat & wind: Give it the brightest spot you have; walls and railings throw back a lot of heat and pots dry fast, so check the mix often in warm weather. Move tender succulents under cover before frost.
- Practicalities: Raise the pot on feet so water drains away freely and does not pool on the balcony floor.
Choosing the Pot, Soil & Long-Term Care
- Pot & drainage: Use a pot with strong drainage holes and skip a standing saucer of water – wet feet are the fastest way to rot a succulent. Terracotta breathes and dries quickly, which suits it well; glazed or plastic holds moisture longer, so water more sparingly.
- Potting mix: A free-draining cactus/succulent mix, or a standard mix opened up with plenty of perlite, pumice or coarse sand; a layer of gravel, lava rock or pebbles in the base helps water clear.
- Feeding: Potted plants use up their soil, so feed lightly once or twice through the growing season with a dilute cactus or balanced feed – far less than a leafy houseplant needs.
- Refreshing the mix: After a couple of years the mix stops draining freely – tip the plant out, trim any tired roots and repot into fresh gritty mix.
Grower’s Container Tip
- Drainage and soil renewal: Growing it in a pot is easy – just make sure there are plenty of drainage holes. Use a cactus mix or sandy soil with a layer of small stones or pebbles in the base, and swap in fresh soil every few years once the old mix breaks down.
Bloom & Flower Guide
Quick Details
- Bloom Season: Winter
- Time to First Bloom: On mature plants; grown mainly for its coppery, spoon-shaped leaves, so bloom is a bonus
- Flower Appearance: Small pink flowers in branched clusters held above the foliage
- Edibility: Not edible — Kalanchoe is toxic to pets and people, and the flowers are among the most toxic parts
Detailed Blooming Overview
Copper spoons is grown for its striking rust-and-silver, spoon-shaped leaves, and a mature plant may add small pink flowers in branched heads during winter. As with most felt-leaved kalanchoes, the foliage is the main event and flowering comes only on well-established specimens in good light.
Flower Characteristics
- Small individual flowers in pink
- Carried in branched clusters on stems above the foliage
- A winter bloomer on mature plants
Bloom Care & Thinning
- Encouraging bloom: Bright light and maturity give the best chance of flowers.
- Aftercare: Cut the spent flower stalk back once it fades.
- Safety: All parts are toxic if eaten and the flowers especially — keep it out of reach of cats, dogs and children.
Pruning, Training & Seasonal Maintenance
Kalanchoe orgyalis is a small, compact accent subshrub grown for its copper-colored velvet foliage. It tolerates light pinching and sanitary trimming well, but it is more cold-marginal than the larger K. beharensis – in the cooler part of its zone 10 range it can die back or need winter cover – so pruning timing has to respect that frost risk in a way that doesn’t apply to hardier relatives.
Quick Pruning & Maintenance Specs
| Pruning Tolerance |
Moderate – tolerates pinching and sanitary trims well |
| Primary Pruning Window |
Spring through summer active growth |
| Secondary Maintenance Window |
As needed, for spent flower stems and infected leaves |
| Typical Frequency |
Light, occasional pinching/trimming rather than a fixed schedule |
| Main Objective |
Keep the compact form; remove spent flowers and disease-affected leaves promptly |
| Young Plant Priority |
Pinch lightly to build a bushy base while growth is still slow |
| Mature Plant Priority |
Shape trim; remove spent flower stems and any mildew/aphid-affected leaves |
| Best Tool Type |
Precision snips (small, soft stems and leaves throughout) |
| Avoid Heavy Pruning During |
Autumn, ahead of the cooler season, in the marginal (10a) end of its range |
Pruning by Plant Age & Size
Newly Established
Growth is naturally slow at this stage; pinch lightly if needed to encourage branching, but there is little to remove yet.
Young / Formative
Light pinching is the only training tool – it builds a fuller, more branched plant. Growth rate tends to pick up somewhat as the plant matures, so formative pinching has more visible effect once the plant is a bit older.
Mature / Established
Trim for design/shape as desired, remove spent flower stems after winter bloom, and inspect for and remove any leaves showing powdery mildew or aphid damage.
Seasonal Pruning Schedule
| Post-Flowering |
Objective: tidy after winter bloom. Remove: spent flower stems. Response: redirects energy to foliage growth; no effect on the following winter’s bloom. |
| Ongoing Sanitary |
Objective: limit pest/disease spread. Remove: leaves showing powdery mildew or aphid infestation, trimmed individually as they appear (per the plant’s own care guidance to trim infected leaves separately from design pruning). Avoid: routine removal of healthy foliage. |
Structural Pruning & Training
Minimal – this is a small accent subshrub, not a large architectural specimen. Shaping is done by light, occasional trims “for design” rather than any formal framework.
Special Growth to Remove
- Spent flower stems – remove after winter bloom finishes.
- Powdery-mildew or aphid-affected leaves – trim out individually, distinct from routine shaping cuts.
Container & Small-Space Pruning
Grows well in containers and can be kept as an indoor houseplant with good light. In marginal outdoor zones (10a), container culture is often the practical choice specifically so the plant can be moved under cover in cold snaps – time any pruning accordingly, well before a move indoors, not right after.
Tools
- Precision snips – the only tool needed given this plant’s small size and soft growth.
Tool Hygiene & Disease Risk
Increased – powdery mildew and aphids are both noted issues. Remove affected leaves promptly and individually (as distinct from cosmetic shaping cuts), avoid working wet foliage, and wipe the blade if moving between an affected plant and healthy ones.
Cut Placement & Technique
Pinch or snip just above a leaf node for shaping cuts; remove infected leaves at their base rather than tearing them off, to avoid wounding the stem.
Heavy Pruning & Rejuvenation
Rarely needed given the plant’s small, naturally compact size; if a stem does stretch or become bare, a light cutback in active season is enough to prompt fresh branching – there is no case for a drastic hard-prune on a plant this small.
Post-Pruning Care
No feeding needed after light pruning. Avoid heavy watering right after cutting, since this species prefers to dry between waterings; watch new growth for aphids, and protect the plant from frost if pruning was done heading into a marginal winter.
Common Pruning Mistakes
- Leaving mildew- or aphid-affected leaves in place instead of trimming them out individually as its own guidance recommends.
- Pruning or repotting right before a cold snap in the marginal end of its hardiness range, stressing a plant that may already need winter protection.
- Overwatering after cutback, which this drought-tolerant succulent does not need.
When NOT to Prune
Avoid pruning heading into cool weather in marginal zones (around 10a), where the plant may already need covering or moving indoors for winter – give any cuts time to settle well before cold arrives.
Recommended Tools (by task)
- precision_snips – all shaping, deadheading, and infected-leaf removal on this small, soft-stemmed subshrub.
Pests, Diseases & Troubleshooting
Overview: Kalanchoes are easy-going succulents whose troubles are overwhelmingly about moisture and light, not insects: overwatering brings stem and root rot — the number-one killer — while the genus is also notably prone to powdery mildew. Sap-suckers like mealybugs, aphids and scale appear mainly on stressed or indoor plants. Grow in gritty free-draining soil, bright light and with a dry-between-waterings routine and it stays healthy.
Quick Troubleshooting Overview
| Issue / Pest |
Main Symptom |
Primary Solution |
| Mealybugs |
White cottony fluff in leaf axils and roots, sticky leaves |
Alcohol swab / hose; insecticidal soap or oil |
| Aphids |
Sticky, distorted flower stems and new growth |
Water jet; insecticidal soap |
| Scale & spider mites |
Brown bumps or fine stippling/webbing |
Horticultural/neem oil; raise humidity for mites |
| Powdery mildew |
White powdery film on leaves |
Airflow, keep leaves dry; sulfur / bicarbonate |
| Stem & root rot |
Soft, black, mushy base; collapse |
Gritty free-draining mix; water sparingly |
| Etiolation / sunburn |
Stretched pale growth, or scorched patches |
Bright light; acclimate to sun gradually |
Common Pests & Management
- Mealybugs (Planococcus citri / Rhizoecus spp.):
- Symptoms: Cottony white tufts tucked into leaf axils and along stems (and, as root mealybugs, white specks on the roots of an unthrifty plant); sticky honeydew, stunting and yellowing follow.
- Prevention & Control: Dab clusters with an alcohol-moistened swab, hose the plant, and treat with insecticidal soap or neem oil; for root mealybugs, bare-root, wash and repot into fresh gritty mix in a clean pot. Avoid over-feeding with nitrogen.
- Aphids (Aphis spp.):
- Symptoms: Soft green, grey or black insects clustered on tender new growth and especially on flower stems and buds, with sticky honeydew and distorted, curled growth.
- Prevention & Control: Rinse off with a water jet, pinch badly infested flower stalks, encourage ladybirds, and use insecticidal soap on persistent colonies.
- Scale insects (Coccus / Aspidiotus spp.):
- Symptoms: Immobile brown or tan bumps on stems and leaf undersides, sticky leaves and sooty mold in heavy cases.
- Prevention & Control: Scrape off light infestations by hand, prune badly affected growth, and smother the rest with horticultural or neem oil in the evening.
- Spider mites (Tetranychus urticae):
- Symptoms: Fine pale stippling, a dull look and fine webbing on leaf undersides in hot, dry indoor air.
- Prevention & Control: Raise humidity a little and rinse the foliage; treat with insecticidal soap or a light miticidal oil, taking care with fuzzy-leaved kinds that mark easily.
- Fungus gnats (Bradysia spp.):
- Symptoms: Small dark flies running over the soil surface; larvae in constantly damp mix nibble roots of seedlings and young plants — a sign the soil is being kept too wet.
- Prevention & Control: Let the top of the mix dry out (which suits the plant anyway), use yellow sticky traps and a gritty top-dressing, and drench with Bacillus thuringiensis israelensis or beneficial nematodes if larvae persist.
Diseases & Fungal Issues
- Powdery mildew (Oidium / Erysiphe spp.):
- Symptoms: White powdery patches or a dusty film on leaves and stems; Kalanchoe is notably susceptible, and infection distorts growth and mars the foliage, worst in crowded, humid, poorly ventilated conditions.
- Treatment & Management: Increase airflow and light, avoid crowding and overhead watering, remove affected leaves, and treat with a sulfur, potassium-bicarbonate or neem-based fungicide; grow on the dry side.
- Stem, crown & root rot (Pythium / Phytophthora / Fusarium spp.):
- Symptoms: A soft, blackening, mushy base or stem, wilting despite (or because of) wet soil, and sudden collapse — the commonest cause of death, driven by overwatering and cold, wet soil.
- Treatment & Management: Prevention is the cure: gritty free-draining mix, careful watering, warmth and never letting the plant sit in water. Cut back to firm, healthy tissue and re-root clean cuttings or offsets; discard badly rotted plants.
- Gray mold (botrytis) (Botrytis cinerea):
- Symptoms: Fuzzy grey-brown mold on leaves, stems or fading flowers in cool, damp, still air, causing soft decay.
- Treatment & Management: Remove affected parts and spent flowers promptly, improve ventilation, lower humidity, and avoid wetting the foliage; a fungicide is rarely needed if airflow is corrected.
- Bacterial soft rot & leaf spot (Erwinia / Xanthomonas spp.):
- Symptoms: Water-soaked, slimy, foul-smelling rot of leaves or stem, or dark angular leaf spots, spreading fast in warm, wet, crowded conditions.
- Treatment & Management: There is no chemical cure — cut out and destroy affected tissue with clean tools, keep foliage dry, improve airflow, and avoid injuring the plant; propagate from clean, healthy material.
Growing Difficulties & Abiotic Problems
- Etiolation (stretching):
- Cause & Symptoms: Pale, weak, elongated growth with widely spaced leaves as the plant reaches for light in too much shade.
- Correction Strategy: Move to bright light or full sun (acclimating gradually), and prune or behead leggy stems to restart compact growth from cuttings.
- Sunburn:
- Cause & Symptoms: Bleached, brown or scorched patches when a shade-grown or newly bought plant is moved abruptly into strong direct sun.
- Correction Strategy: Introduce sun gradually over a week or two; provide light afternoon shade in the hottest climates.
- Overwatering & edema:
- Cause & Symptoms: Soft, translucent, yellowing or blistered leaves and dropping foliage from too-frequent watering or poor drainage; the leading route to rot.
- Correction Strategy: Water only when the mix has dried, use a gritty succulent mix and a pot with drainage, and cut back sharply in cool, low-light periods.
- Cold damage:
- Cause & Symptoms: Translucent, blackened or mushy leaves after exposure below about 5–10°C; these are frost-tender succulents.
- Correction Strategy: Keep above 10°C, move containers indoors or under cover in cold weather, and keep the plant dry when cool to limit rot.
- Water marking of felted leaves:
- Cause & Symptoms: Permanent spots, blotches and trapped moisture on the fine hairs of felt-leaved kinds when watered overhead or splashed.
- Correction Strategy: Water at the soil only, keep droplets off the foliage, and give bright light and airflow so any wetting dries quickly.
What Helps — Products & Tools
Kalanchoe care is mostly about restraint: gritty free-draining soil, bright light and dry-between-waterings routine prevent the rot that kills most plants. For pests, insecticidal soap, neem or horticultural oil covers mealybugs, aphids, scale and mites; yellow sticky traps and a dry surface handle fungus gnats. Sulfur, potassium-bicarbonate or neem fungicide treats the powdery mildew this genus is prone to. Keep foliage dry, especially on felted-leaf types, and spray oils in the evening to protect pollinators.
Propagation Guide
Kalanchoe orgyalis is most easily and quickly started from leaf or stem cuttings, which the site notes root faster and easier than seed; seed is also usable, sown in spring to summer in a sunny spot with lightly moist soil. Overall an Easy plant to propagate.
Quick Propagation Specs
| Best Propagation Method |
Leaf or stem cuttings |
| Alternative Methods |
Seed |
| Propagation Difficulty |
Easy |
| Seed True-to-Type |
Usually true-to-type for the species; the intensity of the copper leaf colour in seedlings can vary, so cuttings are used to guarantee the parent’s colouring |
| Vegetative True-to-Type |
Yes |
| Best Propagation Season |
Spring to summer (site notes all-year planting is possible in the warmest zones) |
| Seed Germination Time |
A few weeks, can be uneven |
| Cutting Rooting Time |
A few weeks, following the shade-callus-then-moist-soil routine described below |
| Germination Temperature |
About 21–24°C (70–75°F) |
| Seed Sowing Depth |
Surface-sow / barely cover; sow in a sunny location |
Growing from Seed
Sowing Season
Sow in spring to summer, as the site specifies, in a sunny location.
Germination Conditions
Keep the soil lightly moist, as the site advises, in a sunny spot; being a succulent, avoid letting the mix stay wet.
Germination Time
A few weeks, can be uneven.
Seedling Care
Grow on with the same care as the mature plant, avoiding overwatering.
Stem Cuttings
Cutting Type
Stem cuttings can be taken in addition to leaf cuttings; the site notes it is possible to cut stems, or to cut a leaf at its base or through its middle.
Cutting Preparation
After cutting, let the cutting sit in a shaded spot for a few days to dry slightly before inserting it into soil, exactly as the site describes.
Rooting Setup
Insert the dried, callused cutting into soil and water it to keep the soil moist, taking care not to overwater, as the site cautions.
Rooting Hormone
Unnecessary — the site notes cuttings root easily on their own and are actually faster and easier than seed.
Rooting Time
Not given precisely by the site; expect roots within a few weeks under the shaded-callus-then-moist-soil routine above.
Leaf & Root Cuttings
Leaf cuttings are explicitly one of this plant’s two vegetative methods per the site: cutting a leaf at its base is described as working better than cutting through the leaf’s middle, though both are usable. As with stem cuttings, let the leaf dry in a shaded spot for a few days before inserting the cut end into soil, then keep the soil moist without overwatering. This leaf-and-stem cutting route is, per the site, easier and faster than starting from seed.